5 Split Squat Variations for High School Athletes
When it comes to building strength in the lower body, high school athletes have several effective options to choose from. Although barbell squats and trap bar deadlifts are more widely known, neither can match the split squat’s simplicity, versatility, or effectiveness. It is quite simply one of the best exercises out there for building real-world strength, increasing muscle mass, and improving athletic performance.
Here are some of the main reasons why:
Functional Strength
Split squats are exceptional at building functional single-leg strength that is transferable to real life and athletics. Since both feet are not under the hips during the exercise, it requires more stabilization and balance to execute. Most of the fundamental movements that athletes will perform, such as jumping, cutting, accelerating, and decelerating, are done on one leg, so they have great carry-over in this regard. Perhaps most importantly, they mimic the basic locomotive pattern and build specific strength for sprinting, the most prized skill of all.
Injury Prevention
Single leg training allows an athlete to take advantage of the so-called bilateral deficit and load a single leg to a greater degree than it could be loaded using two legs. This type of training puts a greater emphasis on the targeted muscles, promotes greater activation of stabilizers, and increases the involvement of the posterior chain. A lack of single-leg strength and stability has often been associated with injuries to the hips, knees, and back, so the inclusion of exercises like split squats can go a long way in countering this threat.
No Spinal Loading
Split squats are excellent at sparing the spine. Unlike back or front squats, split squats do not directly load or compress the spine since almost all versions feature hand-held resistance. There is little risk of incurring a back injury even as loads go up, as the spinal position is rarely the limiting factor. Therefore, split squats have an excellent risk to reward ratio.
Easy-to-learn
It is straightforward to get an athlete off and running on a split squat. In my experience, most athletes can perform one relatively well after simple instructions and can be loaded almost immediately with a light to moderate resistance. Split squats generally have a rapid payoff and are a great tool if you do not have a long offseason to prepare.
Versatility
Few lower body exercises offer an athlete as much versatility in all areas as split squats do. There are endless variations that can continue to provide progressive challenges to beginners and advanced athletes alike. Split squats are also highly adaptable and remain effective across a wide range of equipment scenarios. They can be worked into programs using bodyweight, dumbbells, kettlebells, barbells, single-leg squat bars, bands, ultimate sandbags, and many other pieces of equipment out there. Additionally, they can be loaded in a much more flexible and complementary way than most exercises. It is straightforward to add a weight vest, chain, or sandbag alongside hand-held resistance, providing a unique challenge to athletes in their training.
With this in mind, here are the basics and 5 split squat versions to try:
Set-up & Execution
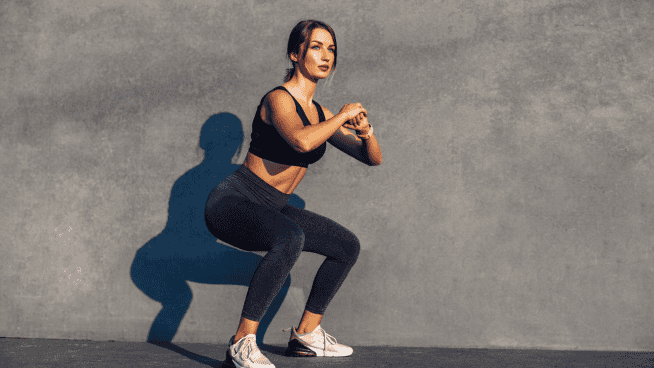
Start in a split stance with your right foot in front and your left foot behind.
- The back foot should be on the ball of the foot
- Bend both knees and lower your center of gravity down towards the floor
- The torso will lean forward slightly but remain mostly upright throughout
- When the back knee is near the floor, reverse directions and return to the start position
Goblet / 2-Dumbbell Split-Squat
Hold a dumbbell or kettlebell with both hands at chest level, or one dumbbell or kettlebell in each hand at your sides.
Follow the instructions above.
Split-Squat w/ Single-leg Squat Bar
This version is the best for using the greatest overall load, as the bar is designed specifically to accommodate this lift.
- Load the bar evenly on the floor or a rack
- Grip the handles tightly, stand up and assume a split stance
- Follow instructions above
Bulgarian Split-squat
- Hold one dumbbell or kettlebell in each hand at your sides
- Start in a split stance with your right foot in front and your left foot behind
- The back foot should rest comfortably on a bench, box, or single-leg squat stand
- Follow the remaining instructions above
2-Kettlebell Rack Position Split-squat
- Bring two kettlebells up to chest level
- The wrists should be straight and the forearms angled in from the torso towards the chin
- The arms should be squeezed in towards the body and held there throughout
- The hands remain close together throughout
- The mass of the kettlebells are supported by the chest and shoulders
- Follow instructions above
2-Kettlebell Offset Split-squat
- Bring one kettlebell up to chest level on your right side (right leg back)
- The right wrist should be straight and the forearm angled in from the torso towards the chin
- The right arm should be squeezed in towards the body and held there throughout
- The mass of the kettlebell is supported by the right chest and shoulder
- Hold the other kettlebell by your left side (left leg forward)
- Follow the remaining instructions above
Read More:
RECOMMENDED FOR YOU
MOST POPULAR
5 Split Squat Variations for High School Athletes
When it comes to building strength in the lower body, high school athletes have several effective options to choose from. Although barbell squats and trap bar deadlifts are more widely known, neither can match the split squat’s simplicity, versatility, or effectiveness. It is quite simply one of the best exercises out there for building real-world strength, increasing muscle mass, and improving athletic performance.
Here are some of the main reasons why:
Functional Strength
Split squats are exceptional at building functional single-leg strength that is transferable to real life and athletics. Since both feet are not under the hips during the exercise, it requires more stabilization and balance to execute. Most of the fundamental movements that athletes will perform, such as jumping, cutting, accelerating, and decelerating, are done on one leg, so they have great carry-over in this regard. Perhaps most importantly, they mimic the basic locomotive pattern and build specific strength for sprinting, the most prized skill of all.
Injury Prevention
Single leg training allows an athlete to take advantage of the so-called bilateral deficit and load a single leg to a greater degree than it could be loaded using two legs. This type of training puts a greater emphasis on the targeted muscles, promotes greater activation of stabilizers, and increases the involvement of the posterior chain. A lack of single-leg strength and stability has often been associated with injuries to the hips, knees, and back, so the inclusion of exercises like split squats can go a long way in countering this threat.
No Spinal Loading
Split squats are excellent at sparing the spine. Unlike back or front squats, split squats do not directly load or compress the spine since almost all versions feature hand-held resistance. There is little risk of incurring a back injury even as loads go up, as the spinal position is rarely the limiting factor. Therefore, split squats have an excellent risk to reward ratio.
Easy-to-learn
It is straightforward to get an athlete off and running on a split squat. In my experience, most athletes can perform one relatively well after simple instructions and can be loaded almost immediately with a light to moderate resistance. Split squats generally have a rapid payoff and are a great tool if you do not have a long offseason to prepare.
Versatility
Few lower body exercises offer an athlete as much versatility in all areas as split squats do. There are endless variations that can continue to provide progressive challenges to beginners and advanced athletes alike. Split squats are also highly adaptable and remain effective across a wide range of equipment scenarios. They can be worked into programs using bodyweight, dumbbells, kettlebells, barbells, single-leg squat bars, bands, ultimate sandbags, and many other pieces of equipment out there. Additionally, they can be loaded in a much more flexible and complementary way than most exercises. It is straightforward to add a weight vest, chain, or sandbag alongside hand-held resistance, providing a unique challenge to athletes in their training.
With this in mind, here are the basics and 5 split squat versions to try:
Set-up & Execution
Start in a split stance with your right foot in front and your left foot behind.
- The back foot should be on the ball of the foot
- Bend both knees and lower your center of gravity down towards the floor
- The torso will lean forward slightly but remain mostly upright throughout
- When the back knee is near the floor, reverse directions and return to the start position
Goblet / 2-Dumbbell Split-Squat
Hold a dumbbell or kettlebell with both hands at chest level, or one dumbbell or kettlebell in each hand at your sides.
Follow the instructions above.
Split-Squat w/ Single-leg Squat Bar
This version is the best for using the greatest overall load, as the bar is designed specifically to accommodate this lift.
- Load the bar evenly on the floor or a rack
- Grip the handles tightly, stand up and assume a split stance
- Follow instructions above
Bulgarian Split-squat
- Hold one dumbbell or kettlebell in each hand at your sides
- Start in a split stance with your right foot in front and your left foot behind
- The back foot should rest comfortably on a bench, box, or single-leg squat stand
- Follow the remaining instructions above
2-Kettlebell Rack Position Split-squat
- Bring two kettlebells up to chest level
- The wrists should be straight and the forearms angled in from the torso towards the chin
- The arms should be squeezed in towards the body and held there throughout
- The hands remain close together throughout
- The mass of the kettlebells are supported by the chest and shoulders
- Follow instructions above
2-Kettlebell Offset Split-squat
- Bring one kettlebell up to chest level on your right side (right leg back)
- The right wrist should be straight and the forearm angled in from the torso towards the chin
- The right arm should be squeezed in towards the body and held there throughout
- The mass of the kettlebell is supported by the right chest and shoulder
- Hold the other kettlebell by your left side (left leg forward)
- Follow the remaining instructions above
Read More:

