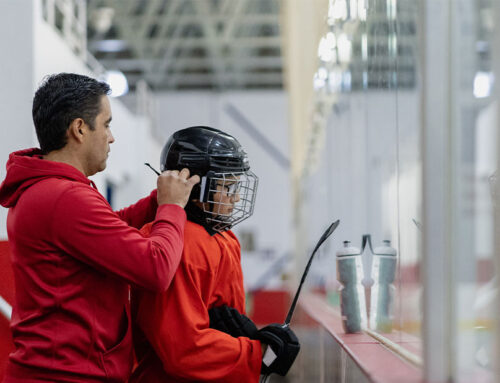
A Six-Step Hinge Progression for Youth Athletes
Teaching youth athletes proper strength training movements can be extremely difficult at times. Regardless of an athlete, many young people are still developing basic motor controls and coordination to perform any exercises, let alone a skillfully balanced lift with a load. This applies even more to achieving a hinge based movement. Seemingly one of the most challenging activities to teach anyone beginning to strength train. This movement can be broken down into a six-step level based series. This article is intended for helping the development of youth athletes, so I prefer to use the word levels instead as younger kids find this as more of a challenge and want to improve from level to level rather than progressions. Also, to give credit where credit is deserved, I first came across this progression from Jim Smith at Diesel Strength.
Level 1: Hip Hinge
The first level we are going to begin our series with is performing the primary hip hinge. When performing this, there is no other intention other than merely hinging at the hips. A relatable definition of the hinge is a moveable joint or mechanism on which an object can freely open and close. Therefore to pass this level, the athlete must easily hinge the hips open and close to complete their rep.
Hinges can be easier said than done, though, and attacks the base of why hinging is one of the most challenging movement patterns for younger individuals to grasp. Teaching a bodyweight hinge where there is a clear objective is a great teaching tool.
Begin with the individual standing a foot away from a wall or an object such as a foam roller. Now the length of distance from the wall is subjective to the individual. However, it is always best to start as close as possible to the wall and then gradually move them farther away from the wall, inch by inch, until they achieve a full range of motion bodyweight hip hinge.
Remember, we are just grading their ability to initiate the hinge by pushing their hips back first and then returning to the starting position. The other several elements of the movement right now will be put on the backend while we successfully pass level 1 and grab this low hanging fruit!
Before passing onto level 2, would be to perform ten perfect reps consecutively throughout a set successfully.
Level 2: Hip Hinge
Add Neutral Posture
Every time we move up to the next level, we do not want to disregard the previous lessons learned in the last group, so we are always adding to our foundation. This level will focus on successfully performing the hip hinge with the addition of a neutral posture.
Maintaining a neutral spine position is one of the common issues in performing a proper hip hinge. Far too often, younger athletes cannot disassociate their hips from their upper body, so their back begins to round with them when they push their hips back. A good cue to think of is that you want to treat your spine if it is one long piece, so it shouldn’t be able to flex or move. They need to understand that their upper body is not active throughout the lift besides staying neutral and moving just with the hips but not moving. Now I had to reread that a few times to make sure I understood what I was saying, so I would certainly never attempt to explain that to an 11-year-old.
Giving them a dowel rod or stick to perform the movement is a lesson that requires them to feel more and thinks less. When performing the hip hinge, you want to make sure they maintain contact with the stick with their head, back, and but. If they lose connection in one of the areas, then they have lost the neutral position. Try to allow the athlete to hold the stick themselves if they are able. If not, you can keep it on their back for them, but they may need to perform the reps a little slower.
The athletes do not have to perform the movement still to the wall, as shown in the video, but it is helpful if needed.
Like level 1 passing requirements, the athlete should perform ten perfect consecutive reps before moving on to level 3.
Level 3: Hip Hinge
Add Brace
In addition to the hinge with the neutral spine position, level 3 will be adding a brace throughout the movement. This level is critical because eventually, we want to ensure control and safety when we begin to perform the load. Creating a brace can help physically prepare the body for this and make proper intention throughout the movement.
When creating a brace, you can use a light resistance band as an external cue by having the athlete wear it over their belly button. You may have to fold the band over itself once or twice to fit some smaller athletes, but we want the band snug enough around the waist that it doesn’t just fall on their feet, yet not so snug it cuts off circulation. The band is a fantastic external cue because when we teach our brace, we will do so by focusing on inhaling a big deep breath of air and driving out three-dimensionally into our band as if we were filling up a balloon.
Three-dimensional is the key; doing this creates a circumferential brace or tension. We don’t want them to push out forward but also need to brace out through the obliques and the lower back to ensure a total global brace and intention throughout the hinge. Once an athlete is comfortable creating the movement without the teaching cues such as the wall, dowel rod, or the resistance band, you can take the training wheels off, but feel free to leave them on if needed and progress as required.
Gauging the brace’s effectiveness can’t as quickly be seen with the eye, but look for expansion of the band, and you can also use touch as an external cue to ensure they are creating the total trunk tension and brace needed to pass this level.
Perform 10 perfect consecutive reps before moving on to level 4.
Level 4: Hip Hinge
Add Torque
In level 4, we are going to add in the objective to create torque. The torque intends to help generate more activation throughout the lower body, especially utilizing the hips and knees to make this torque,
Please think of this similar to the tension of a coil before performing our hinge. With all of the previous level’slevel’s focus in mind, we want our athlete to screw their feet into the ground, building tension throughout the hips and lower body. Utilizing a smaller resistance band is a fantastic external cue because it gives the individual something to push out against as they perform the movement.
Once the movement has begun, and the hips begin to push back, the knees should drive outward, slightly pressing against the band but should be tight as the feet are screwed tightly into the ground. Once the movement is complete and the individual begins returning to the top, this torque is released helping them drive more explosively back to the starting position.
Perform 10 perfect consecutive reps before moving onto level 5.
Level 5: Hip Hinge
Add powerful lockout
Getting to level 5, the individual should have a pretty solid hinge pattern thus far. They should be able to effectively perform all previous four stories into one robust and coordinated movement. Think of level 5 as just adding the cherry on top.
Level 5 will focus on completing each rep and add a powerful lockout at the closed position of the hinge. Creating a powerful lockout is more important than just telling them to squeeze their but tight. That is a part, but not the whole piece.
To get to this point, they should be competent in the previous four levels and hopefully not require external teaching tools. Mostly because we have two additional tools we may need to utilize. We still want to make sure they cover all of the previous things we did, although it should be second nature to them by now. We want to focus on adding the powerful lockout portion.
Tying a few resistance bands together and anchoring them to a rack will create our first external cue, and I would recommend utilizing it for every youth athlete you work with whether they struggle with the hinge movement or not. The bands work great because they will assist in the hinge, pulling them back, making the exercise more natural, and then resist as they come back to the top to lockout and completing the rep. The band is useful because individuals, especially younger individuals, can forget or lose focus on the movement’s intention. Therefore, using the band keeps constant engagement from the first to the last rep, and you must lock out the hips hard as the bands will be giving the most resistance when the athlete is standing straight.
The other external tool will be a small weight plate or kettlebell. This should be small and light anything more decadent than 10lbs is probably unnecessary and would hinder the tool’s purpose. The reason we are going to be holding the weight is to create engagement in the lockout from the upper body. As discussed earlier, the lockout involves a lot more effort than just squeezing the but tight. For a successful lockout position, you also need intense lat engagement and trunk stability. Using a weight can help create this by telling the individual to rip the plate into two separate pieces. The athlete should immediately begin to pull down and apart on the weight creating both lat and trunk engagement. The lockout is about global body tension rather than just a particular half. If one portion is prepared while the other is lazy, then there is a significant weak link in the chain, leading to many issues down the line.
Once the athlete can complete 10 perfect consecutive reps with a powerful lockout on each, they are ready to begin putting them together in level 6.
Level 6: Hip Hinge
Strength Training
Each level adds in a new element while still holding value in the previous level taught. This should ensure that not one single aspect was forgotten or not practiced enough. Level 6 is putting all of the last 5 levels together through strength training.
Yes, all of the previous levels will still be cued and considered when performing reps, but it is time for the athlete to test themselves with more complex movements. Level 6, though, is not always guaranteed, and the athlete needs to earn their right to strength train. Some may struggle with a particular level for quite some time before they get to strength train. This is perfectly fine and getting them to understand the process is essential for their continued growth. You don’t need to explain the six levels of hinge progressions and the importance of three-dimension circumferential breathing, but they should know they have to pass this before moving onto the next step. The younger they are, the longer and more refined the process may be for these movements.
Some example movements may include weighted Romanian Deadlifts, kettlebell swings, band pull-throughs, and deadlift variations if appropriate. An example of a proper exercise selection progression could look something like this;
- Level 1-5 of Hinge Progressions
- Band Pull throughs
- Kettlebell Swings
- Dumbbell/Kettlebell Romanian Deadlifts
- Deadlift Variation (Hex Bar, Kettlebell, Dumbbell, Elevated, etc.)
This is just an example of a strength training progression. Many roads lead to Rome, even though some streets are quicker or safer. The progression should be based on the individual or group you’re working within. Regardless though, each progression should begin by passing levels 1-5 beforehand. That way, the cues will be practiced throughout the strength training to build proper movement competency continuously.
Just as a guideline, stick to the 10 consecutive repetitions, but the deeper we progress, the more individualized this process will become. Some individuals may still require all or just some of the external teaching tools to continue on. Some may just be struggling with one particular aspect and so on. Teaching this movement in levels is effective because individuals can focus on a single aspect of the lift and block it into pieces before constructing it into one larger piece at the end.
While teaching the hinge movement is one of the most difficult for younger athletes to understand, it is possible. This six-step progression has helped me tremendously over the years and helped address specific issues and give many athletes greater confidence in the weight room. Not all individuals will struggle with the same problems, and some will progress much faster than others. The critical thing to remember is that we’re building a foundation, and the bigger the foundation can be built, the higher the peak can be. A pyramid is only as big as its base. Don’tDon’t rush this series if it is not appropriate, and let your athletes see their progress as they improve.
RECOMMENDED FOR YOU


MOST POPULAR


A Six-Step Hinge Progression for Youth Athletes
Teaching youth athletes proper strength training movements can be extremely difficult at times. Regardless of an athlete, many young people are still developing basic motor controls and coordination to perform any exercises, let alone a skillfully balanced lift with a load. This applies even more to achieving a hinge based movement. Seemingly one of the most challenging activities to teach anyone beginning to strength train. This movement can be broken down into a six-step level based series. This article is intended for helping the development of youth athletes, so I prefer to use the word levels instead as younger kids find this as more of a challenge and want to improve from level to level rather than progressions. Also, to give credit where credit is deserved, I first came across this progression from Jim Smith at Diesel Strength.
Level 1: Hip Hinge
The first level we are going to begin our series with is performing the primary hip hinge. When performing this, there is no other intention other than merely hinging at the hips. A relatable definition of the hinge is a moveable joint or mechanism on which an object can freely open and close. Therefore to pass this level, the athlete must easily hinge the hips open and close to complete their rep.
Hinges can be easier said than done, though, and attacks the base of why hinging is one of the most challenging movement patterns for younger individuals to grasp. Teaching a bodyweight hinge where there is a clear objective is a great teaching tool.
Begin with the individual standing a foot away from a wall or an object such as a foam roller. Now the length of distance from the wall is subjective to the individual. However, it is always best to start as close as possible to the wall and then gradually move them farther away from the wall, inch by inch, until they achieve a full range of motion bodyweight hip hinge.
Remember, we are just grading their ability to initiate the hinge by pushing their hips back first and then returning to the starting position. The other several elements of the movement right now will be put on the backend while we successfully pass level 1 and grab this low hanging fruit!
Before passing onto level 2, would be to perform ten perfect reps consecutively throughout a set successfully.
Level 2: Hip Hinge
Add Neutral Posture
Every time we move up to the next level, we do not want to disregard the previous lessons learned in the last group, so we are always adding to our foundation. This level will focus on successfully performing the hip hinge with the addition of a neutral posture.
Maintaining a neutral spine position is one of the common issues in performing a proper hip hinge. Far too often, younger athletes cannot disassociate their hips from their upper body, so their back begins to round with them when they push their hips back. A good cue to think of is that you want to treat your spine if it is one long piece, so it shouldn’t be able to flex or move. They need to understand that their upper body is not active throughout the lift besides staying neutral and moving just with the hips but not moving. Now I had to reread that a few times to make sure I understood what I was saying, so I would certainly never attempt to explain that to an 11-year-old.
Giving them a dowel rod or stick to perform the movement is a lesson that requires them to feel more and thinks less. When performing the hip hinge, you want to make sure they maintain contact with the stick with their head, back, and but. If they lose connection in one of the areas, then they have lost the neutral position. Try to allow the athlete to hold the stick themselves if they are able. If not, you can keep it on their back for them, but they may need to perform the reps a little slower.
The athletes do not have to perform the movement still to the wall, as shown in the video, but it is helpful if needed.
Like level 1 passing requirements, the athlete should perform ten perfect consecutive reps before moving on to level 3.
Level 3: Hip Hinge
Add Brace
In addition to the hinge with the neutral spine position, level 3 will be adding a brace throughout the movement. This level is critical because eventually, we want to ensure control and safety when we begin to perform the load. Creating a brace can help physically prepare the body for this and make proper intention throughout the movement.
When creating a brace, you can use a light resistance band as an external cue by having the athlete wear it over their belly button. You may have to fold the band over itself once or twice to fit some smaller athletes, but we want the band snug enough around the waist that it doesn’t just fall on their feet, yet not so snug it cuts off circulation. The band is a fantastic external cue because when we teach our brace, we will do so by focusing on inhaling a big deep breath of air and driving out three-dimensionally into our band as if we were filling up a balloon.
Three-dimensional is the key; doing this creates a circumferential brace or tension. We don’t want them to push out forward but also need to brace out through the obliques and the lower back to ensure a total global brace and intention throughout the hinge. Once an athlete is comfortable creating the movement without the teaching cues such as the wall, dowel rod, or the resistance band, you can take the training wheels off, but feel free to leave them on if needed and progress as required.
Gauging the brace’s effectiveness can’t as quickly be seen with the eye, but look for expansion of the band, and you can also use touch as an external cue to ensure they are creating the total trunk tension and brace needed to pass this level.
Perform 10 perfect consecutive reps before moving on to level 4.
Level 4: Hip Hinge
Add Torque
In level 4, we are going to add in the objective to create torque. The torque intends to help generate more activation throughout the lower body, especially utilizing the hips and knees to make this torque,
Please think of this similar to the tension of a coil before performing our hinge. With all of the previous level’slevel’s focus in mind, we want our athlete to screw their feet into the ground, building tension throughout the hips and lower body. Utilizing a smaller resistance band is a fantastic external cue because it gives the individual something to push out against as they perform the movement.
Once the movement has begun, and the hips begin to push back, the knees should drive outward, slightly pressing against the band but should be tight as the feet are screwed tightly into the ground. Once the movement is complete and the individual begins returning to the top, this torque is released helping them drive more explosively back to the starting position.
Perform 10 perfect consecutive reps before moving onto level 5.
Level 5: Hip Hinge
Add powerful lockout
Getting to level 5, the individual should have a pretty solid hinge pattern thus far. They should be able to effectively perform all previous four stories into one robust and coordinated movement. Think of level 5 as just adding the cherry on top.
Level 5 will focus on completing each rep and add a powerful lockout at the closed position of the hinge. Creating a powerful lockout is more important than just telling them to squeeze their but tight. That is a part, but not the whole piece.
To get to this point, they should be competent in the previous four levels and hopefully not require external teaching tools. Mostly because we have two additional tools we may need to utilize. We still want to make sure they cover all of the previous things we did, although it should be second nature to them by now. We want to focus on adding the powerful lockout portion.
Tying a few resistance bands together and anchoring them to a rack will create our first external cue, and I would recommend utilizing it for every youth athlete you work with whether they struggle with the hinge movement or not. The bands work great because they will assist in the hinge, pulling them back, making the exercise more natural, and then resist as they come back to the top to lockout and completing the rep. The band is useful because individuals, especially younger individuals, can forget or lose focus on the movement’s intention. Therefore, using the band keeps constant engagement from the first to the last rep, and you must lock out the hips hard as the bands will be giving the most resistance when the athlete is standing straight.
The other external tool will be a small weight plate or kettlebell. This should be small and light anything more decadent than 10lbs is probably unnecessary and would hinder the tool’s purpose. The reason we are going to be holding the weight is to create engagement in the lockout from the upper body. As discussed earlier, the lockout involves a lot more effort than just squeezing the but tight. For a successful lockout position, you also need intense lat engagement and trunk stability. Using a weight can help create this by telling the individual to rip the plate into two separate pieces. The athlete should immediately begin to pull down and apart on the weight creating both lat and trunk engagement. The lockout is about global body tension rather than just a particular half. If one portion is prepared while the other is lazy, then there is a significant weak link in the chain, leading to many issues down the line.
Once the athlete can complete 10 perfect consecutive reps with a powerful lockout on each, they are ready to begin putting them together in level 6.
Level 6: Hip Hinge
Strength Training
Each level adds in a new element while still holding value in the previous level taught. This should ensure that not one single aspect was forgotten or not practiced enough. Level 6 is putting all of the last 5 levels together through strength training.
Yes, all of the previous levels will still be cued and considered when performing reps, but it is time for the athlete to test themselves with more complex movements. Level 6, though, is not always guaranteed, and the athlete needs to earn their right to strength train. Some may struggle with a particular level for quite some time before they get to strength train. This is perfectly fine and getting them to understand the process is essential for their continued growth. You don’t need to explain the six levels of hinge progressions and the importance of three-dimension circumferential breathing, but they should know they have to pass this before moving onto the next step. The younger they are, the longer and more refined the process may be for these movements.
Some example movements may include weighted Romanian Deadlifts, kettlebell swings, band pull-throughs, and deadlift variations if appropriate. An example of a proper exercise selection progression could look something like this;
- Level 1-5 of Hinge Progressions
- Band Pull throughs
- Kettlebell Swings
- Dumbbell/Kettlebell Romanian Deadlifts
- Deadlift Variation (Hex Bar, Kettlebell, Dumbbell, Elevated, etc.)
This is just an example of a strength training progression. Many roads lead to Rome, even though some streets are quicker or safer. The progression should be based on the individual or group you’re working within. Regardless though, each progression should begin by passing levels 1-5 beforehand. That way, the cues will be practiced throughout the strength training to build proper movement competency continuously.
Just as a guideline, stick to the 10 consecutive repetitions, but the deeper we progress, the more individualized this process will become. Some individuals may still require all or just some of the external teaching tools to continue on. Some may just be struggling with one particular aspect and so on. Teaching this movement in levels is effective because individuals can focus on a single aspect of the lift and block it into pieces before constructing it into one larger piece at the end.
While teaching the hinge movement is one of the most difficult for younger athletes to understand, it is possible. This six-step progression has helped me tremendously over the years and helped address specific issues and give many athletes greater confidence in the weight room. Not all individuals will struggle with the same problems, and some will progress much faster than others. The critical thing to remember is that we’re building a foundation, and the bigger the foundation can be built, the higher the peak can be. A pyramid is only as big as its base. Don’tDon’t rush this series if it is not appropriate, and let your athletes see their progress as they improve.