The Beginner’s Guide to Strength Training
Walking into a gym for the first time can be quite intimidating. Strong lifters will be moving massive amounts of weight while you might have a hard time doing a few Push-Ups.
But that’s OK. Everyone has to stop somewhere. And most importantly, you should never let anyone or anything discourage you from working out.
To prevent your first adventure into a gym from becoming a negative experience, we came up with a six-step process that will help you get the most out of your first training sessions while avoiding embarrassing mistakes.
Step 1: Identify Your Goals
Before you even sign up for a gym, you need to identify your goals. Assuming you’re a newbie, odds are you want to add some strength and size, which is perfectly fine and normal. With consistent hard work, you will achieve these goals.
However, we encourage you to be specific. Do you just want to add strength and size, or do you want to add strength and size to improve your performance on the football field? Specificity will also allow you to hone in on a training facility and type of workout that will help you develop as an athlete.
We also encourage you to set short-term process goals to help you stick to your training schedule and get the most out of your workouts. A few examples include:
- I will work out for 60 minutes three times per week
- I will try my hardest every workout
- I will take the time to learn exercise technique
- I will workout in the morning and/or evening
These goals are simply suggestions. Write down your own goals and plan accordingly.
Step 2: Find the Perfect Gym
When choosing a gym, consider the commute, equipment, facility quality and available services. The gym should be close enough that you won’t scoff at the drive while providing an environment for athletic development.
Depending on where you live, you may have a plethora of gym options or you may not have a single gym within a 15-minute drive. If you fall into the latter group, this section doesn’t apply to you as you will need to sign up for whatever is available and convenient.
Large chain gyms offer flashy promotions and fancy facilities, but most times smaller privately-owned facilities do a better job of catering to athletes. Make sure to do your research because privately owned facilities are often located off-the-beaten-path or hidden in industrial parks.
You can get an idea of what type of individual the gym caters to by doing a quick walk through the facility. Do you see the majority of clients on treadmills, a bunch of machines and hardly any free weights? Odds are this isn’t a place where you want to be.
Be on the lookout for athletes or other strong individuals, plenty of dumbbells, barbells, plates, benches and squat racks, and ideally a place where you can do a dynamic warm-up and some speed drills. You should also have no fear of dropping the occasional weight and grunting (within reason) on a hard rep without being shamed.
Many gyms will offer free assessments when you sign up. Take advantage of this, especially if they offer a Functional Movement Screen. This will help you identify weaknesses and learn where you need to improve.
Step 3: Gear Up (To An Extent)
News flash. You don’t need much to go to the gym but you also don’t want to look totally out of place by lifting in a pair of jorts and construction boots.
Any type of breathable athletic t-shirt, shorts, sweatshirt and sweatpants are perfectly fine. Compression shorts are also a must.
For footwear, look for training shoes that have a flat bottom, which are optimal for lifting weights. Two great options are the Nike Metcon DSX Flyknit and the Reebok JJ II Trainers.
We also recommend purchasing a small workout bag so you can stash a notebook and pen for keeping track of your workouts, headphones (not gigantic over-the-ear ones, please) and any other gym accessories you acquire. You can also toss your phone, keys and wallet in this during your workouts.
Step 4: Familiarize yourself with common gym equipment and terms
Here are the basic pieces of equipment and terms you need to know before beginning to work out.
Equipment:
- Barbell – Most barbells weigh 45 pounds and are used for Squats, Deadlifts, Bench Presses and other exercises.
- Dumbbells – A handle with weights on each side that are held in each hand.
- Kettlebell – A heavy ball with a handle that allows you to do swinging exercises.
- Adjustable Bench – A bench that can be adjusted from a flat position to a 90-degree angle.
- Rack/Cage – A metal structure designed to support a barbell for lifts like he Squat and Bench Press, and typically features some type of safety mechanism, such as pins.
- Collars/Clips – Metal or plastic collars and clips prevent plates from sliding off the barbell.
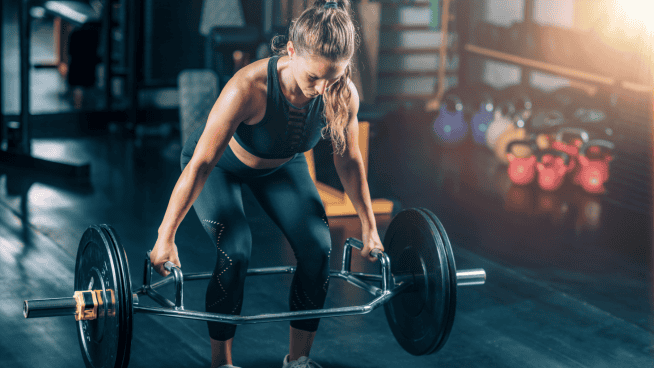
- Trap Bar – A hexagon-shaped bar that allows for variations of popular exercises, such as the Trap Bar Deadlift.
- Swiss Ball/Physioball/Exercise Ball – Inflatable balls that come in various sizes typically used for core exercises and instability training.
- Suspension Trainer – Straps with handles that hang from the ceiling and allow unique exercise variations.
- Med Ball – Heavy balls that are designed for throwing and slamming.
- Resistance Bands – Thick bands used as a substitute or in addition to weights.
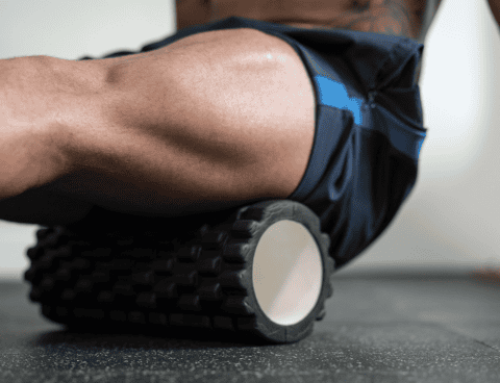
- Foam Roller – A small cylinder that can help relieve muscle tension.
Lifting Terms
- Reps – The number of times you perform an exercise (e.g., I squatted for 5 reps).
- Sets – The number of rounds of reps you complete (e.g., I squatted for 3 sets of 5 reps each).
- Rest – The amount of time you spend resting between sets.
- 1RM/Max – The maximum amount of weight you can lift on a single rep.
- Superset – Two exercises paired together and performed back to back with minimal rest, and are typically repeated for multiple sets.
- Circuit – A group of three or more exercises performed consecutively, and are typically repeated for multiple sets.
- Bodyweight Exercises – Self-explanatory. Any exercise done with just your body weight and without weights.
- Compound Exercises – Any exercise that involves two or more joints.
- Isolation Exercises – Any exercise that involves a single joint and targets a single muscle group.
Step 5: Have a plan
You should have a plan before you go to the gym for the first time. The last thing you want to do is look totally lost, get in the way of other lifters and waste your time.
Do your best to have some type of workout program written down in a notebook or chart. Creating a program or finding a good one can be tough as a beginner, so your best bet is to consult with a strength and conditioning professional. If you don’t have access to one at your gym, many great strength coaches offer online coaching or have books and digital products featuring workouts.
If this isn’t possible, pair up with a friend who knows their way around the weight room, or do your own research and find a plan or create one.
In general, a beginner workout should feature:
- A dynamic warm-up
- Optional: Ladder work and speed drills
- A full-body strength workout featuring beginner bodyweight, cable and dumbbell exercise variations of the primary movements below:
- Squat: TRX Squats, Bodyweight Squats, Goblet Squats
- Hinge: 3-Point Hinge, Glute Bridge, Kettlebell Deadlift
- Lunge: Split Squat, Reverse Lunge, Bulgarian Split Squat
- Push: Push-Ups, Dumbbell Press, Explosive Med Ball Throws
- Pull: Seated Rows, Dumbbell Rows, Assisted Pull-Ups
- Core/Carry: Plank, Farmer’s Walk, Suitcase Carry
- Optional: Conditioning (if needed)
- Cooldown
A sample beginner workout might look like:
Warm-Up
1) Glute Bridge – 1×10
2) Quadruped Extension-Rotation – 1×8 each side
3) Yoga Push-Up Complex – 1×8
4) Split Stance Adductor Mobilization – 1×8 each leg
5) Wall Hip Flexor Mobilization – 1×8 each leg
6) Alternating Lateral Lunge w/ Overhead Reach – 1×5 each side
7) Lateral High Knee Skips – 1×15 yards each direction
Strength
Perform grouped exercises (i.e., 1A and 1B) in a superset.
1A) Bodyweight Squats – 3×12
1B) Dumbbell Row – 3×12
2A) Glute Bridge – 3×12
2B) Push-Ups – 3×12
3A) Reverse Lunge – 3×12 each leg
3B) Assisted Pull-Ups – 3×12
4) Farmer’s Walks – 4×25 yards
Cooldown
1) Quad Foam Roll – 1×2 min. each side
2) TFL Stretch – 1×1 min. each side
3) Overhead Lunge and Press – 1×10 each side
As you might notice, there’s no mention of the Bench Press, Back Squat or Deadlift. These are fantastic exercises and you should strive to eventually perform them, but we wouldn’t recommend learning them on your own as a beginner. Although it can be frustrating, you need to build a base of strength and simply learn how to work out before attempting these advanced lifts.
It’s imperative that you focus on your form with every exercise. This is a great time to learn the proper way to move, or else you will develop bad habits that you’ll ultimately need to correct somewhere down the line. Either pair up with a friend who knows what they’re doing or find form tips on STACK, YouTube and other websites. It’s always helpful to have a workout partner film you doing an exercise and compare your form to videos of experts doing the same exercise.
Also, don’t be afraid to ask questions. Many strength coaches will happily answer questions over emails or social media, even if you’re not their clients. However, be respectful of their time. Ask one or two questions and no more. Here’s a list of some of the top strength coaches you should follow on Instagram to learn how to workout.
Step 6: Avoid stupid mistakes
The most experienced athletes have done some dumb things in the weight room at one point or another. Hopefully, it was something that was annoying and garnered a few angry glares and not something that caused an injury.
Regardless, we want to help you get ahead of the game so you can avoid repeating one of the many, many mistakes that athletes have made in the weight room.
Don’t: Horde multiple sets of dumbbells or pieces of equipment
Do: Put your weights away when you’re finished
Do: Wipe down equipment after you finish.
Don’t: Listen to music (or sing) so loudly that everyone around you can hear it.
Don’t: Do Curls in the squat rack
Do: Ask for a spot for the Bench Press, Dumbbell Press, Overhead Press and Back Squats.
Don’t: Treat the gym like social hour.
Do: Write down the sets, reps and weight you use during an exercise.
Don’t: Sit and stare at your phone.
Do: Ask for advice or help.
Don’t: Believe everything you hear.
Do: Challenge yourself.
Don’t: Sacrifice form for using heavier weights.
Do: Start your workout with compound exercises.
Don’t: Start your workouts with arm exercises.
READ MORE:
RECOMMENDED FOR YOU
MOST POPULAR
The Beginner’s Guide to Strength Training
Walking into a gym for the first time can be quite intimidating. Strong lifters will be moving massive amounts of weight while you might have a hard time doing a few Push-Ups.
But that’s OK. Everyone has to stop somewhere. And most importantly, you should never let anyone or anything discourage you from working out.
To prevent your first adventure into a gym from becoming a negative experience, we came up with a six-step process that will help you get the most out of your first training sessions while avoiding embarrassing mistakes.
Step 1: Identify Your Goals
Before you even sign up for a gym, you need to identify your goals. Assuming you’re a newbie, odds are you want to add some strength and size, which is perfectly fine and normal. With consistent hard work, you will achieve these goals.
However, we encourage you to be specific. Do you just want to add strength and size, or do you want to add strength and size to improve your performance on the football field? Specificity will also allow you to hone in on a training facility and type of workout that will help you develop as an athlete.
We also encourage you to set short-term process goals to help you stick to your training schedule and get the most out of your workouts. A few examples include:
- I will work out for 60 minutes three times per week
- I will try my hardest every workout
- I will take the time to learn exercise technique
- I will workout in the morning and/or evening
These goals are simply suggestions. Write down your own goals and plan accordingly.
Step 2: Find the Perfect Gym
When choosing a gym, consider the commute, equipment, facility quality and available services. The gym should be close enough that you won’t scoff at the drive while providing an environment for athletic development.
Depending on where you live, you may have a plethora of gym options or you may not have a single gym within a 15-minute drive. If you fall into the latter group, this section doesn’t apply to you as you will need to sign up for whatever is available and convenient.
Large chain gyms offer flashy promotions and fancy facilities, but most times smaller privately-owned facilities do a better job of catering to athletes. Make sure to do your research because privately owned facilities are often located off-the-beaten-path or hidden in industrial parks.
You can get an idea of what type of individual the gym caters to by doing a quick walk through the facility. Do you see the majority of clients on treadmills, a bunch of machines and hardly any free weights? Odds are this isn’t a place where you want to be.
Be on the lookout for athletes or other strong individuals, plenty of dumbbells, barbells, plates, benches and squat racks, and ideally a place where you can do a dynamic warm-up and some speed drills. You should also have no fear of dropping the occasional weight and grunting (within reason) on a hard rep without being shamed.
Many gyms will offer free assessments when you sign up. Take advantage of this, especially if they offer a Functional Movement Screen. This will help you identify weaknesses and learn where you need to improve.
Step 3: Gear Up (To An Extent)
News flash. You don’t need much to go to the gym but you also don’t want to look totally out of place by lifting in a pair of jorts and construction boots.
Any type of breathable athletic t-shirt, shorts, sweatshirt and sweatpants are perfectly fine. Compression shorts are also a must.
For footwear, look for training shoes that have a flat bottom, which are optimal for lifting weights. Two great options are the Nike Metcon DSX Flyknit and the Reebok JJ II Trainers.
We also recommend purchasing a small workout bag so you can stash a notebook and pen for keeping track of your workouts, headphones (not gigantic over-the-ear ones, please) and any other gym accessories you acquire. You can also toss your phone, keys and wallet in this during your workouts.
Step 4: Familiarize yourself with common gym equipment and terms
Here are the basic pieces of equipment and terms you need to know before beginning to work out.
Equipment:
- Barbell – Most barbells weigh 45 pounds and are used for Squats, Deadlifts, Bench Presses and other exercises.
- Dumbbells – A handle with weights on each side that are held in each hand.
- Kettlebell – A heavy ball with a handle that allows you to do swinging exercises.
- Adjustable Bench – A bench that can be adjusted from a flat position to a 90-degree angle.
- Rack/Cage – A metal structure designed to support a barbell for lifts like he Squat and Bench Press, and typically features some type of safety mechanism, such as pins.
- Collars/Clips – Metal or plastic collars and clips prevent plates from sliding off the barbell.
- Trap Bar – A hexagon-shaped bar that allows for variations of popular exercises, such as the Trap Bar Deadlift.
- Swiss Ball/Physioball/Exercise Ball – Inflatable balls that come in various sizes typically used for core exercises and instability training.
- Suspension Trainer – Straps with handles that hang from the ceiling and allow unique exercise variations.
- Med Ball – Heavy balls that are designed for throwing and slamming.
- Resistance Bands – Thick bands used as a substitute or in addition to weights.
- Foam Roller – A small cylinder that can help relieve muscle tension.
Lifting Terms
- Reps – The number of times you perform an exercise (e.g., I squatted for 5 reps).
- Sets – The number of rounds of reps you complete (e.g., I squatted for 3 sets of 5 reps each).
- Rest – The amount of time you spend resting between sets.
- 1RM/Max – The maximum amount of weight you can lift on a single rep.
- Superset – Two exercises paired together and performed back to back with minimal rest, and are typically repeated for multiple sets.
- Circuit – A group of three or more exercises performed consecutively, and are typically repeated for multiple sets.
- Bodyweight Exercises – Self-explanatory. Any exercise done with just your body weight and without weights.
- Compound Exercises – Any exercise that involves two or more joints.
- Isolation Exercises – Any exercise that involves a single joint and targets a single muscle group.
Step 5: Have a plan
You should have a plan before you go to the gym for the first time. The last thing you want to do is look totally lost, get in the way of other lifters and waste your time.
Do your best to have some type of workout program written down in a notebook or chart. Creating a program or finding a good one can be tough as a beginner, so your best bet is to consult with a strength and conditioning professional. If you don’t have access to one at your gym, many great strength coaches offer online coaching or have books and digital products featuring workouts.
If this isn’t possible, pair up with a friend who knows their way around the weight room, or do your own research and find a plan or create one.
In general, a beginner workout should feature:
- A dynamic warm-up
- Optional: Ladder work and speed drills
- A full-body strength workout featuring beginner bodyweight, cable and dumbbell exercise variations of the primary movements below:
- Squat: TRX Squats, Bodyweight Squats, Goblet Squats
- Hinge: 3-Point Hinge, Glute Bridge, Kettlebell Deadlift
- Lunge: Split Squat, Reverse Lunge, Bulgarian Split Squat
- Push: Push-Ups, Dumbbell Press, Explosive Med Ball Throws
- Pull: Seated Rows, Dumbbell Rows, Assisted Pull-Ups
- Core/Carry: Plank, Farmer’s Walk, Suitcase Carry
- Optional: Conditioning (if needed)
- Cooldown
A sample beginner workout might look like:
Warm-Up
1) Glute Bridge – 1×10
2) Quadruped Extension-Rotation – 1×8 each side
3) Yoga Push-Up Complex – 1×8
4) Split Stance Adductor Mobilization – 1×8 each leg
5) Wall Hip Flexor Mobilization – 1×8 each leg
6) Alternating Lateral Lunge w/ Overhead Reach – 1×5 each side
7) Lateral High Knee Skips – 1×15 yards each direction
Strength
Perform grouped exercises (i.e., 1A and 1B) in a superset.
1A) Bodyweight Squats – 3×12
1B) Dumbbell Row – 3×12
2A) Glute Bridge – 3×12
2B) Push-Ups – 3×12
3A) Reverse Lunge – 3×12 each leg
3B) Assisted Pull-Ups – 3×12
4) Farmer’s Walks – 4×25 yards
Cooldown
1) Quad Foam Roll – 1×2 min. each side
2) TFL Stretch – 1×1 min. each side
3) Overhead Lunge and Press – 1×10 each side
As you might notice, there’s no mention of the Bench Press, Back Squat or Deadlift. These are fantastic exercises and you should strive to eventually perform them, but we wouldn’t recommend learning them on your own as a beginner. Although it can be frustrating, you need to build a base of strength and simply learn how to work out before attempting these advanced lifts.
It’s imperative that you focus on your form with every exercise. This is a great time to learn the proper way to move, or else you will develop bad habits that you’ll ultimately need to correct somewhere down the line. Either pair up with a friend who knows what they’re doing or find form tips on STACK, YouTube and other websites. It’s always helpful to have a workout partner film you doing an exercise and compare your form to videos of experts doing the same exercise.
Also, don’t be afraid to ask questions. Many strength coaches will happily answer questions over emails or social media, even if you’re not their clients. However, be respectful of their time. Ask one or two questions and no more. Here’s a list of some of the top strength coaches you should follow on Instagram to learn how to workout.
Step 6: Avoid stupid mistakes
The most experienced athletes have done some dumb things in the weight room at one point or another. Hopefully, it was something that was annoying and garnered a few angry glares and not something that caused an injury.
Regardless, we want to help you get ahead of the game so you can avoid repeating one of the many, many mistakes that athletes have made in the weight room.
Don’t: Horde multiple sets of dumbbells or pieces of equipment
Do: Put your weights away when you’re finished
Do: Wipe down equipment after you finish.
Don’t: Listen to music (or sing) so loudly that everyone around you can hear it.
Don’t: Do Curls in the squat rack
Do: Ask for a spot for the Bench Press, Dumbbell Press, Overhead Press and Back Squats.
Don’t: Treat the gym like social hour.
Do: Write down the sets, reps and weight you use during an exercise.
Don’t: Sit and stare at your phone.
Do: Ask for advice or help.
Don’t: Believe everything you hear.
Do: Challenge yourself.
Don’t: Sacrifice form for using heavier weights.
Do: Start your workout with compound exercises.
Don’t: Start your workouts with arm exercises.
READ MORE:


