DIY (Do It Yourself) Fitness: Unleash Your Inner MacGyver
Gym memberships can be expensive, and top-of-the-line equipment might seem out of reach. And maybe you don’t like going to the gym and being in the comforts of your own home. With that being said, what if I told you that you could create highly effective fitness tools right at home using simple, inexpensive materials? It’s not only possible, but it’s also incredibly rewarding.
Let’s dive into the world of DIY fitness and show you how to make your own equipment.
Why DIY Fitness?
Back in my teen years in the 1980s, I used to make my own fitness equipment. I was into building muscle but was way ahead of my time. I used to make my own functional equipment and do functional exercises with resistance training. For example, for medicine balls, I would use old basketballs and soccer balls, fill them with dirt, and throw them at the wall. Furthermore, we had a strip of grass and dirt in my small backyard. I used to take the pickax and drive it into the dirt like sledgehammer training.
Here are more of my childhood exercises:
- I took two hammers and alternately hammered the dirt for a triceps workout.
- At the beach in the summertime, using sand or dirt in the backyard, I would dig a hole with my hands and scoop the dirt toward me. And then push it back into the hole. Great for hand, arm, and shoulder strength.
- Furthermore, in the winter, I would go out and shovel snow for all the neighbors, and I continued doing this throughout my life. Shoveling snow is a great workout.
When I got older and started running trails, I used to look for rocks that I could lift, throw, walk up the hills with, squat, deadlift, lung, etc. Also, I used trees for upper body isometric resistance.
So, DIY fitness will help, most importantly, show you that fitness is all around you.
Here are more benefits of DIY fitness.
- Cost-Effective: Repurpose items you already own or find affordable alternatives.
- Customization: Tailor equipment to your specific needs and preferences.
- Resourcefulness: Develop problem-solving skills and creativity.
- Sustainability: Reduce waste and your environmental footprint.
- Fun: Transform fitness into a fun and engaging project.
DIY Equipment Ideas
- Sandbag: Fill a duffle bag or old backpack with dirt, sand, or gravel. Use it for squats, lunges, presses, carries, etc. It even makes a great rucking bag.
- Medicine Ball: Take an old basketball or soccer ball. Or go to Five and Below and buy a five-dollar ball. Cut a 3-inch slit and fill the ball with sand and secure it by wrapping duct tape around the ball a few times. This is perfect for slams, throws, and core work.
- Dumbbells: Fill empty milk jugs with water or sand. You can also take plastic bottles and cut a hole through the top. Run a strong rope through the holes, tie it off, and fill. Now, when you curl or press the weight, it will move back and forth, creating instability like one of those expensive waterbags. For heavier weights, you can even use paint cans and buckets. Just make sure the handles are secure.
- Pull-Up Bar: Buy or take a rope that is strong enough to hold your body weight. Secure it around a sturdy tree branch or bar on a gate.
- Plyo Box: Stack and secure wooden crates or sturdy boxes to create different heights for box jumps and step-ups. Or use steps in your home or outside.
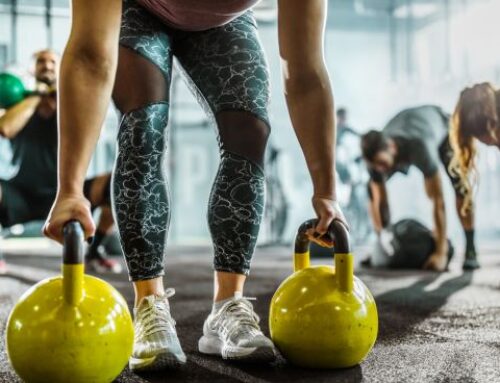
- Kettlebell: Attach a handle to a sturdy container like a paint can or a filled water bottle. You can also use a backpack filled with dirt, sand, or gravel.
- Balance Board: Secure a piece of wood to a PVC pipe or sturdy cylinder.
- Suspension Trainer: Use a sturdy strap or rope looped around a secure anchor point.
- Dip Station: Use sturdy chairs or parallel bars.
DIY Safety First
DIY fitness is not just building and using it. Follow the 3 Ss of DIY Fitness.
Make sure it is Safe, Secure, and Sturdy.
- Safe: Always inspect materials for wear and tear before use.
- Secure: Ensure any DIY equipment is secure.
- Sturdy: Be sure your equipment is stable and sturdy so it does not break while using it.
Additional Tips
- Online Resources: The internet is full of DIY fitness ideas and tutorials. Get inspired!
- Repurpose: Look for household items that can be repurposed for fitness. Old tires, water bottles, and even furniture can be transformed.
DIY fitness is more than just a budget-friendly option—it’s a movement that produces creativity, resourcefulness, and self-reliance. It’s about empowering yourself to take charge of your health and well-being and to find joy in the process.
By building your own equipment, you’re not just saving money, you’re forging a deeper connection to your fitness journey. Every workout becomes a testament to your ingenuity and determination. So, unleash your inner MacGyver, embrace DIY fitness, and embark on a fitness adventure that’s uniquely your own. You might be surprised at what you can achieve with a little creativity and some common household items.
Check out my INSTANT STRENGTH book for total strength, speed, and power programs.
To maximize stability, mobility, and flexibility, check out my book, THE BALANCED BODY.
To see great exercises, methods, and techniques videos, subscribe to my YouTube channel, BALANCED BODY.
RECOMMENDED FOR YOU
MOST POPULAR
DIY (Do It Yourself) Fitness: Unleash Your Inner MacGyver
Gym memberships can be expensive, and top-of-the-line equipment might seem out of reach. And maybe you don’t like going to the gym and being in the comforts of your own home. With that being said, what if I told you that you could create highly effective fitness tools right at home using simple, inexpensive materials? It’s not only possible, but it’s also incredibly rewarding.
Let’s dive into the world of DIY fitness and show you how to make your own equipment.
Why DIY Fitness?
Back in my teen years in the 1980s, I used to make my own fitness equipment. I was into building muscle but was way ahead of my time. I used to make my own functional equipment and do functional exercises with resistance training. For example, for medicine balls, I would use old basketballs and soccer balls, fill them with dirt, and throw them at the wall. Furthermore, we had a strip of grass and dirt in my small backyard. I used to take the pickax and drive it into the dirt like sledgehammer training.
Here are more of my childhood exercises:
- I took two hammers and alternately hammered the dirt for a triceps workout.
- At the beach in the summertime, using sand or dirt in the backyard, I would dig a hole with my hands and scoop the dirt toward me. And then push it back into the hole. Great for hand, arm, and shoulder strength.
- Furthermore, in the winter, I would go out and shovel snow for all the neighbors, and I continued doing this throughout my life. Shoveling snow is a great workout.
When I got older and started running trails, I used to look for rocks that I could lift, throw, walk up the hills with, squat, deadlift, lung, etc. Also, I used trees for upper body isometric resistance.
So, DIY fitness will help, most importantly, show you that fitness is all around you.
Here are more benefits of DIY fitness.
- Cost-Effective: Repurpose items you already own or find affordable alternatives.
- Customization: Tailor equipment to your specific needs and preferences.
- Resourcefulness: Develop problem-solving skills and creativity.
- Sustainability: Reduce waste and your environmental footprint.
- Fun: Transform fitness into a fun and engaging project.
DIY Equipment Ideas
- Sandbag: Fill a duffle bag or old backpack with dirt, sand, or gravel. Use it for squats, lunges, presses, carries, etc. It even makes a great rucking bag.
- Medicine Ball: Take an old basketball or soccer ball. Or go to Five and Below and buy a five-dollar ball. Cut a 3-inch slit and fill the ball with sand and secure it by wrapping duct tape around the ball a few times. This is perfect for slams, throws, and core work.
- Dumbbells: Fill empty milk jugs with water or sand. You can also take plastic bottles and cut a hole through the top. Run a strong rope through the holes, tie it off, and fill. Now, when you curl or press the weight, it will move back and forth, creating instability like one of those expensive waterbags. For heavier weights, you can even use paint cans and buckets. Just make sure the handles are secure.
- Pull-Up Bar: Buy or take a rope that is strong enough to hold your body weight. Secure it around a sturdy tree branch or bar on a gate.
- Plyo Box: Stack and secure wooden crates or sturdy boxes to create different heights for box jumps and step-ups. Or use steps in your home or outside.
- Kettlebell: Attach a handle to a sturdy container like a paint can or a filled water bottle. You can also use a backpack filled with dirt, sand, or gravel.
- Balance Board: Secure a piece of wood to a PVC pipe or sturdy cylinder.
- Suspension Trainer: Use a sturdy strap or rope looped around a secure anchor point.
- Dip Station: Use sturdy chairs or parallel bars.
DIY Safety First
DIY fitness is not just building and using it. Follow the 3 Ss of DIY Fitness.
Make sure it is Safe, Secure, and Sturdy.
- Safe: Always inspect materials for wear and tear before use.
- Secure: Ensure any DIY equipment is secure.
- Sturdy: Be sure your equipment is stable and sturdy so it does not break while using it.
Additional Tips
- Online Resources: The internet is full of DIY fitness ideas and tutorials. Get inspired!
- Repurpose: Look for household items that can be repurposed for fitness. Old tires, water bottles, and even furniture can be transformed.
DIY fitness is more than just a budget-friendly option—it’s a movement that produces creativity, resourcefulness, and self-reliance. It’s about empowering yourself to take charge of your health and well-being and to find joy in the process.
By building your own equipment, you’re not just saving money, you’re forging a deeper connection to your fitness journey. Every workout becomes a testament to your ingenuity and determination. So, unleash your inner MacGyver, embrace DIY fitness, and embark on a fitness adventure that’s uniquely your own. You might be surprised at what you can achieve with a little creativity and some common household items.
Check out my INSTANT STRENGTH book for total strength, speed, and power programs.
To maximize stability, mobility, and flexibility, check out my book, THE BALANCED BODY.
To see great exercises, methods, and techniques videos, subscribe to my YouTube channel, BALANCED BODY.

