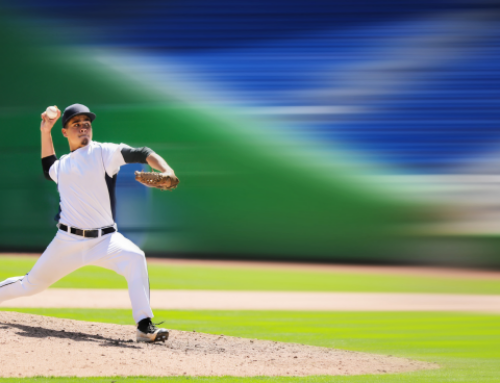
How to Throw a Fastball
When you’re learning how to throw a fastball, you must master a few techniques involving grip, hand placement and pitching mechanics. Let’s go over some of the basics.
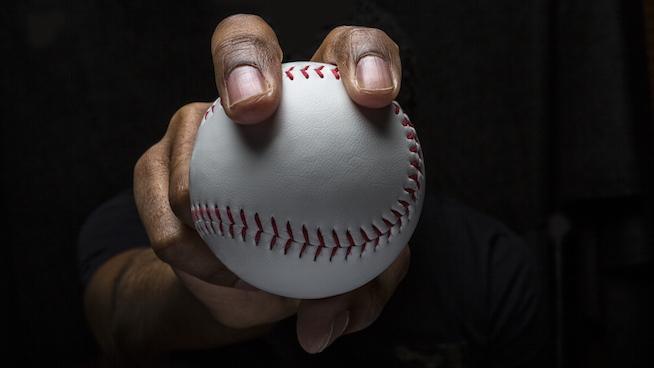
The size of your fingers partly determine how you hold the ball. If your hands are on the smaller side, you may need to use more fingers to control the fastball. The pictures in this article show an athlete who uses two fingers and a thumb on the ball. If you need to add a third finger to control the pitch, slide your middle finger closer to your index finger and add your ring finger.
Baseball Fastball Grip
To grip the four-seam fastball, place your fingertips directly on the perpendicular seam of the baseball. Your thumb should be underneath the ball in a comfortable position. The thumb assists with control and potential movement as you perfect your fastball. We teach our athletes to hold the ball like an egg, softly in their fingertips.
If your hand is large enough, there will be a gap between the ball and your palm. Hold the ball as loosely as possible and still be able to control it. This will allow the ball to spin out of your hand faster, so it can travel at maximum velocity. The faster the ball spins, the faster it travels, creating what is often referred to as a “heavy ball.”
The second fastball that we teach is the two-seam fastball. Hand placement is similar to the four-seam fastball, except the fingers are placed in line with the seams rather than perpendicular to them as with the four-seam fastball. Try the two-seam after you can control the four-seam, because the two-seam requires more control and more movement.
Baseball Being Thrown From Hand
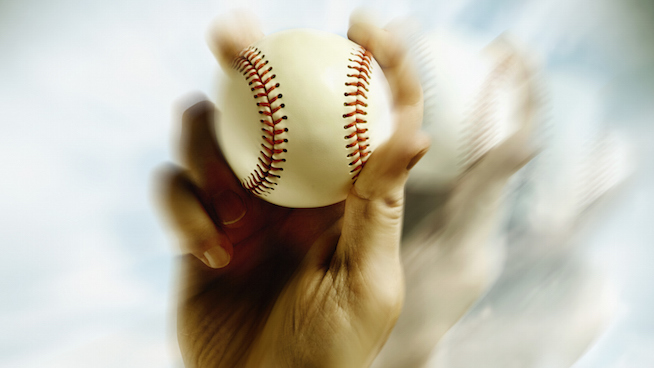
After you learn to throw a fastball, work on throwing at targets with proper arm action. If you can grip the ball and throw with good action, you should be able to locate your throws. And after you can locate your fastball while playing catch, you can begin to work on pitching.
Start on flat ground to get the mechanics down before you try to pitch from the mound. Bad mechanics is exaggerated on the mound and can lead to injury.
From here, the three keys to pitching are balance, power, and finish.
1. Balance
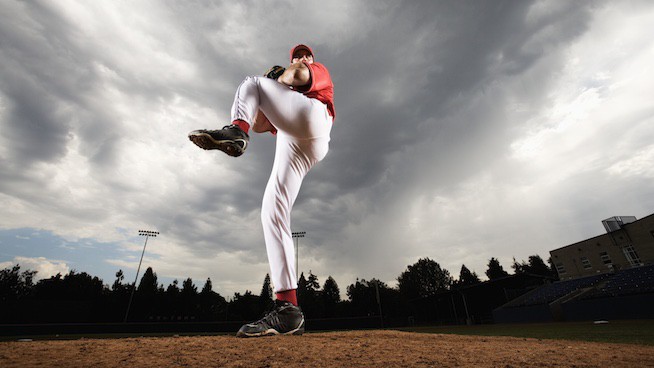
First, establish a balance point. In its simplest form, this is where the pitcher is basically “loading” to pitch (as seen in the picture). The head is on the target, and the eyes stay focused on the catcher’s mitt throughout each step.
Pitcher
2. Power
For power, your landing or lead foot should be in line with your back foot and the target. Your front knee should also be pointed at the target to allow your hips to rotate your body toward the release point. Your head is still on target and in the middle of your body at this point; notice the eyes on the mitt.

ST. PETERSBURG, FL – SEPTEMBER 18: Pitcher Derek Holland #45 of the Texas Rangers starts against the Tampa Bay Rays September 18, 2013 at Tropicana Field in St. Petersburg, Florida. (Photo by Al Messerschmidt/Getty Images)
The glove hand is also a checkpoint. Your glove should start out toward the catcher. Your wrist rotates and your elbow stays tucked in close to your side. One of the biggest checkpoints is the elbow in relation to the collarbone or shoulder. Your elbow should remain above your shoulder as seen below. If your elbow consistently drops below your shoulder, you will not throw many fastballs as you get older.
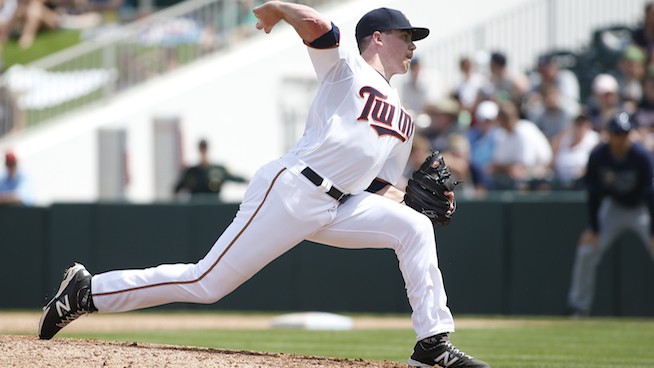
FORT MYERS, FL – MARCH 11: Pitcher Trevor May #65 of the Minnesota Twins delivers a pitch during the fourth inning of a spring training game against the Tampa Bay Rays on March 11, 2015 at Hammond Stadium in Fort Myers, Florida. (Photo by Brian Blanco/Getty Images)
As seen in the front-view photo below, your glove-side elbow is tucked into the side. Your front leg and knee are pointed toward the target. At the point of release, your head is over your front knee. Athletes have different release points; the stronger your arm, the later your release point can be. The release point determines location.
3. Finish
Take your throwing elbow to your opposite knee. Your glove and elbow are still locked in close to your side. Your head and eyes are still on target.
Finishing properly allows you to use your body to absorb the energy you exerted to throw a fastball. The back of you shoulder will become sore if you do not finish, and you could injure yourself.

PHOENIX, AZ – OCTOBER 28: Arizona Diamondbacks’ pitcher Randy Johnson watches his delivery to a New York Yankees batter during the 1st inning of Game 2 of the 2001 World Series in Phoenix 28 October 2001. The New York Yankees are playing the Arizona Diamondbacks. (Photo credit should read MATT YORK/AFP/Getty Images)
Zach Greinke’s pitching mechanics can be seen in slow motion in the video below.
RECOMMENDED FOR YOU
How to Throw a Fastball
When you’re learning how to throw a fastball, you must master a few techniques involving grip, hand placement and pitching mechanics. Let’s go over some of the basics.
The size of your fingers partly determine how you hold the ball. If your hands are on the smaller side, you may need to use more fingers to control the fastball. The pictures in this article show an athlete who uses two fingers and a thumb on the ball. If you need to add a third finger to control the pitch, slide your middle finger closer to your index finger and add your ring finger.

Baseball Fastball Grip
To grip the four-seam fastball, place your fingertips directly on the perpendicular seam of the baseball. Your thumb should be underneath the ball in a comfortable position. The thumb assists with control and potential movement as you perfect your fastball. We teach our athletes to hold the ball like an egg, softly in their fingertips.
If your hand is large enough, there will be a gap between the ball and your palm. Hold the ball as loosely as possible and still be able to control it. This will allow the ball to spin out of your hand faster, so it can travel at maximum velocity. The faster the ball spins, the faster it travels, creating what is often referred to as a “heavy ball.”
The second fastball that we teach is the two-seam fastball. Hand placement is similar to the four-seam fastball, except the fingers are placed in line with the seams rather than perpendicular to them as with the four-seam fastball. Try the two-seam after you can control the four-seam, because the two-seam requires more control and more movement.

Baseball Being Thrown From Hand
After you learn to throw a fastball, work on throwing at targets with proper arm action. If you can grip the ball and throw with good action, you should be able to locate your throws. And after you can locate your fastball while playing catch, you can begin to work on pitching.
Start on flat ground to get the mechanics down before you try to pitch from the mound. Bad mechanics is exaggerated on the mound and can lead to injury.
From here, the three keys to pitching are balance, power, and finish.
1. Balance
First, establish a balance point. In its simplest form, this is where the pitcher is basically “loading” to pitch (as seen in the picture). The head is on the target, and the eyes stay focused on the catcher’s mitt throughout each step.

Pitcher
2. Power
For power, your landing or lead foot should be in line with your back foot and the target. Your front knee should also be pointed at the target to allow your hips to rotate your body toward the release point. Your head is still on target and in the middle of your body at this point; notice the eyes on the mitt.

ST. PETERSBURG, FL – SEPTEMBER 18: Pitcher Derek Holland #45 of the Texas Rangers starts against the Tampa Bay Rays September 18, 2013 at Tropicana Field in St. Petersburg, Florida. (Photo by Al Messerschmidt/Getty Images)
The glove hand is also a checkpoint. Your glove should start out toward the catcher. Your wrist rotates and your elbow stays tucked in close to your side. One of the biggest checkpoints is the elbow in relation to the collarbone or shoulder. Your elbow should remain above your shoulder as seen below. If your elbow consistently drops below your shoulder, you will not throw many fastballs as you get older.

FORT MYERS, FL – MARCH 11: Pitcher Trevor May #65 of the Minnesota Twins delivers a pitch during the fourth inning of a spring training game against the Tampa Bay Rays on March 11, 2015 at Hammond Stadium in Fort Myers, Florida. (Photo by Brian Blanco/Getty Images)
As seen in the front-view photo below, your glove-side elbow is tucked into the side. Your front leg and knee are pointed toward the target. At the point of release, your head is over your front knee. Athletes have different release points; the stronger your arm, the later your release point can be. The release point determines location.
3. Finish
Take your throwing elbow to your opposite knee. Your glove and elbow are still locked in close to your side. Your head and eyes are still on target.
Finishing properly allows you to use your body to absorb the energy you exerted to throw a fastball. The back of you shoulder will become sore if you do not finish, and you could injure yourself.

PHOENIX, AZ – OCTOBER 28: Arizona Diamondbacks’ pitcher Randy Johnson watches his delivery to a New York Yankees batter during the 1st inning of Game 2 of the 2001 World Series in Phoenix 28 October 2001. The New York Yankees are playing the Arizona Diamondbacks. (Photo credit should read MATT YORK/AFP/Getty Images)
Zach Greinke’s pitching mechanics can be seen in slow motion in the video below.

