Design Your Own Off-Season Baseball Throwing Program
When they think about baseball throwing programs, coaches and players often look for a one-size-fits-all solution. But since not all ballplayers have the same strengths and weaknesses, each player should address his own needs and goals when creating a program.
Here are some key elements that should be included in every off-season baseball throwing program.
Dynamic warm-up
Many baseball players throw to warm up. They should, however, warm up to throw. Prior to picking up a baseball, you should perform a solid dynamic warm-up, which will allow you to maximize your body’s performance potential. Simply throwing to warm up does not prepare you for the demands of baseball.
Starting with a dynamic warm-up increases blood flow, raises your body’s core temperature and maintains elasticity in your muscles.
Resistance-band work
A series of shoulder exercises with resistance bands should follow your full-body dynamic warm-up. They will activate key musculature surrounding your shoulder and prepare it to throw. Use of resistance bands has shown to improve strength, proprioception, muscle performance characteristics, athletic performance and injury prevention.[1]
Here are three examples you can try after your dynamic warm-up.
Shoulder Extension
- Anchor the band in a high fixed position.
- Face the anchor point with your hands starting at shoulder height, your elbows straight and your thumbs facing up.
- Retract your shoulder blades.
- Drive your hands down and past your hips. Keep your elbows straight throughout the movement.
- When you reach the end range of the movement, return to the starting position.
- Repeat for 10-15 reps.
Scapular punches
- Anchor the band in a middle or high fixed position.
- Face away from the anchor point with your hands starting at shoulder height with your elbows bent.
- Retract your shoulder blades.
- Drive your hands forward in a punching motion. Continue until your elbows are straight and your shoulder blade is protracted.
- When you reach the end range of the movement, return to the starting position.
- Repeat for 10-15 reps.
External rotation at 90° of abduction
- Anchor the band in a low fixed position.
- Face the anchor point with your elbow bent 90 degrees at shoulder height and your shoulder internally rotated.
- Retract your shoulder blades.
- Start the movement by externally rotating your shoulder until your hand is above your shoulder. Keep your elbow bent at shoulder height.
- When you reach the end range of the movement, return to the starting position, keeping your elbow at shoulder height.
- Repeat for 10-15 reps.
Long toss
During the throwing portion of your program, you have to remember that no two players are alike. “Standard” throwing programs may be good for rehabbing athletes, but they are impractical for ballplayers with healthy shoulders, since they are usually limited to 120-150 feet.
Long toss involves throwing a baseball beyond 180 feet (some say 250 feet or more). Many coaches are against long toss, but the drill builds arm strength and conditions the shoulder to be more durable.
Lengthening phase. This is where you want to focus on good mechanics and loose-arm action. Gradually lengthen your distance every few throws and use a crow hop once you hit the 70- to 80-foot mark. Increase to a distance that your arm and body can handle for that day.
Pull-down or compression phase. After reaching your max distance in the lengthening phase, you can shorten the distance again. Continue to use a crow hop and throw once every 15 to 20 feet. Keep the ball on a line as you throw. Take the effort you put into your longest throw and apply it to the shorter throws.
Flat-ground work or position-specific work. If you are a pitcher, mix in 15 to 20 pitches on flat ground as you concentrate on solid mechanics and keeping the ball down in the strike zone. For position players, feel free to work on any position-specific drills (infield, outfield, catching).
Soft tissue work
Soft tissue work is essential to an athlete’s training program, but it is often neglected or omitted. Soft tissue work can help with sore or tight muscles and overall recovery.
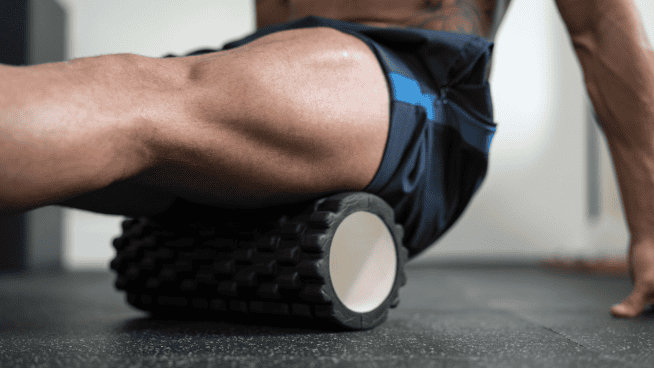
Apply pressure to sore or tight muscles with a foam roller. In the context of your throwing program, you can include foam rolling prior to your dynamic warm-up to help decrease muscle tightness. Try foam rolling these five areas:
- Glutes
- IT Band
- Quads
- Groin
- Thoracic Spine (mid/upper back)
Spend at least one minute per body part. If needed, return to more sensitive areas or where you feel you need more work.
A throwing program involves more than throwing. Approach your routine from a full-body perspective. Including each of the elements described above will set you up for success and prepare your body for the demands of baseball.
Read more:
- Build Your Baseball Throwing Program With These Drills
- Hunter Pence’s Workout for a Strong Throwing Arm
- 4 Ways to Take Care of Your Throwing Arm
Reference:
[1] Myers JB, Pasquale MR, Laudner KG, Sell TC, Bradley JP, Lephart SM. “On-the-Field Resistance-Tubing Exercises for Throwers: An Electromyographic Analysis.” Journal of Athletic Training. 2005;40(1):15-22.
[cf]skyword_tracking_tag[/cf]RECOMMENDED FOR YOU
MOST POPULAR
Design Your Own Off-Season Baseball Throwing Program
When they think about baseball throwing programs, coaches and players often look for a one-size-fits-all solution. But since not all ballplayers have the same strengths and weaknesses, each player should address his own needs and goals when creating a program.
Here are some key elements that should be included in every off-season baseball throwing program.
Dynamic warm-up
Many baseball players throw to warm up. They should, however, warm up to throw. Prior to picking up a baseball, you should perform a solid dynamic warm-up, which will allow you to maximize your body’s performance potential. Simply throwing to warm up does not prepare you for the demands of baseball.
Starting with a dynamic warm-up increases blood flow, raises your body’s core temperature and maintains elasticity in your muscles.
Resistance-band work
A series of shoulder exercises with resistance bands should follow your full-body dynamic warm-up. They will activate key musculature surrounding your shoulder and prepare it to throw. Use of resistance bands has shown to improve strength, proprioception, muscle performance characteristics, athletic performance and injury prevention.[1]
Here are three examples you can try after your dynamic warm-up.
Shoulder Extension
- Anchor the band in a high fixed position.
- Face the anchor point with your hands starting at shoulder height, your elbows straight and your thumbs facing up.
- Retract your shoulder blades.
- Drive your hands down and past your hips. Keep your elbows straight throughout the movement.
- When you reach the end range of the movement, return to the starting position.
- Repeat for 10-15 reps.
Scapular punches
- Anchor the band in a middle or high fixed position.
- Face away from the anchor point with your hands starting at shoulder height with your elbows bent.
- Retract your shoulder blades.
- Drive your hands forward in a punching motion. Continue until your elbows are straight and your shoulder blade is protracted.
- When you reach the end range of the movement, return to the starting position.
- Repeat for 10-15 reps.
External rotation at 90° of abduction
- Anchor the band in a low fixed position.
- Face the anchor point with your elbow bent 90 degrees at shoulder height and your shoulder internally rotated.
- Retract your shoulder blades.
- Start the movement by externally rotating your shoulder until your hand is above your shoulder. Keep your elbow bent at shoulder height.
- When you reach the end range of the movement, return to the starting position, keeping your elbow at shoulder height.
- Repeat for 10-15 reps.
Long toss
During the throwing portion of your program, you have to remember that no two players are alike. “Standard” throwing programs may be good for rehabbing athletes, but they are impractical for ballplayers with healthy shoulders, since they are usually limited to 120-150 feet.
Long toss involves throwing a baseball beyond 180 feet (some say 250 feet or more). Many coaches are against long toss, but the drill builds arm strength and conditions the shoulder to be more durable.
Lengthening phase. This is where you want to focus on good mechanics and loose-arm action. Gradually lengthen your distance every few throws and use a crow hop once you hit the 70- to 80-foot mark. Increase to a distance that your arm and body can handle for that day.
Pull-down or compression phase. After reaching your max distance in the lengthening phase, you can shorten the distance again. Continue to use a crow hop and throw once every 15 to 20 feet. Keep the ball on a line as you throw. Take the effort you put into your longest throw and apply it to the shorter throws.
Flat-ground work or position-specific work. If you are a pitcher, mix in 15 to 20 pitches on flat ground as you concentrate on solid mechanics and keeping the ball down in the strike zone. For position players, feel free to work on any position-specific drills (infield, outfield, catching).
Soft tissue work
Soft tissue work is essential to an athlete’s training program, but it is often neglected or omitted. Soft tissue work can help with sore or tight muscles and overall recovery.
Apply pressure to sore or tight muscles with a foam roller. In the context of your throwing program, you can include foam rolling prior to your dynamic warm-up to help decrease muscle tightness. Try foam rolling these five areas:
- Glutes
- IT Band
- Quads
- Groin
- Thoracic Spine (mid/upper back)
Spend at least one minute per body part. If needed, return to more sensitive areas or where you feel you need more work.
A throwing program involves more than throwing. Approach your routine from a full-body perspective. Including each of the elements described above will set you up for success and prepare your body for the demands of baseball.
Read more:
- Build Your Baseball Throwing Program With These Drills
- Hunter Pence’s Workout for a Strong Throwing Arm
- 4 Ways to Take Care of Your Throwing Arm
Reference:
[1] Myers JB, Pasquale MR, Laudner KG, Sell TC, Bradley JP, Lephart SM. “On-the-Field Resistance-Tubing Exercises for Throwers: An Electromyographic Analysis.” Journal of Athletic Training. 2005;40(1):15-22.
[cf]skyword_tracking_tag[/cf]


