8 Exercises For Strong and Healthy Shoulders
Everyone wants to have those big, broad “boulder” shoulders.
The problem is that there tends to be a good amount of aches and pain that come with the traditional training required to get them.
Imagine if you could get those big strong shoulders while also actually reducing the amount of shoulder pain you experience? The good news is it’s possible, you just have to train the shoulders a little bit different than usual–you’ve got to get a little unconventional. You also have to really develop the whole shoulder in all planes of motion, especially the back side of the shoulders and upper back.
Here’s a breakdown of the top 8 shoulder exercises we use with our athletes to not only develop those big strong shoulders, but to also keep them healthy, too.
Landmine Raise
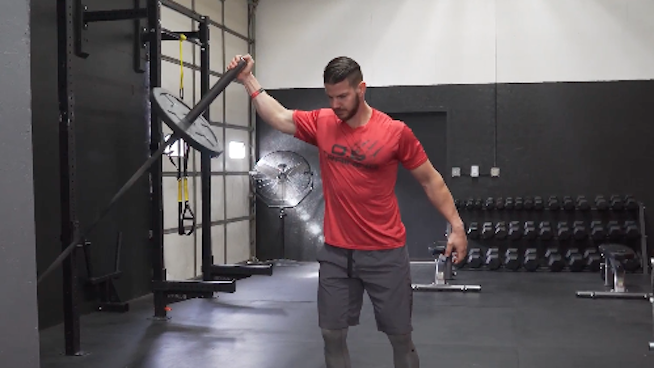
See move at the :11 mark of above video
The Landmine Raise is a great alternative to your typical Lateral Raise shoulder exercise performed with dumbbells. By using the Landmine, the path of the weight when pulled is actually in an up-and-back angle which forces you to use the lateral and posterior heads of your deltoids. This takes some of the pressure off the front side of your deltoids and reduces the risk of pinching which commonly occurs in the shoulder joint.
Band Pull Apart
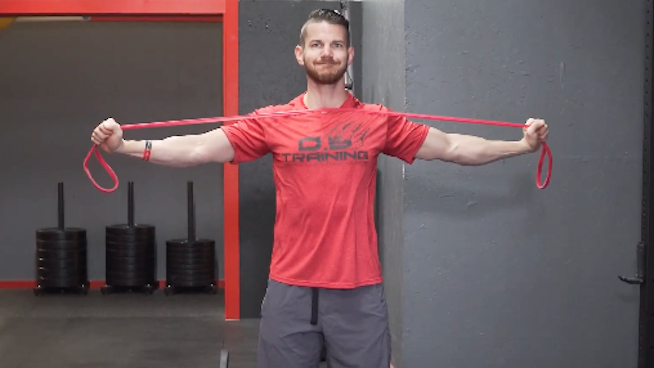
See move at :26 mark of above video
This is probably my favorite upper back and shoulder exercise to help reduce the incidence of pain while pressing. The key here is to keep the shoulder blades pulled down and back while you perform this exercise so the upper traps do not take over. Really focus on engaging the lower traps as you attempt to pull the band through your body.
Band Reverse Fly
See move at :42 mark of above video
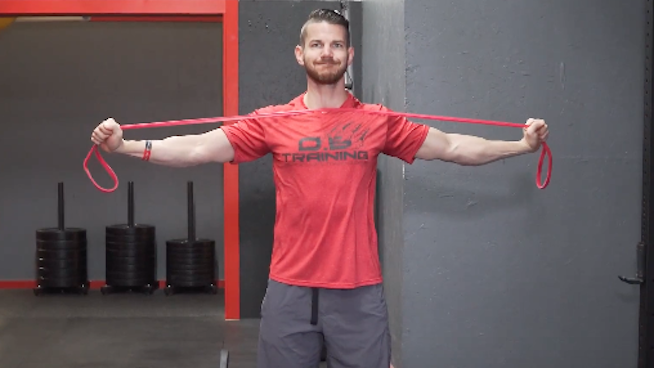
Another great exercise for building the upper back and posterior side of the shoulders. Loop a band around a pole and simply slide your two arms inside of the looped band. From here you want to keep the arms at a 90 degree angle and “open” the arms trying to bring the two points of your elbows together as you pull back. The placement of the band on the edge of the wrist creates an additional training effect by forcing your external rotators to stay activated throughout the movement in order to keep the 90-degree angle. Some people may struggle with this. To modify, simply move the band closer to the elbow.
Band Face Pull / Y-Press
See move at 1:02 mark of above video
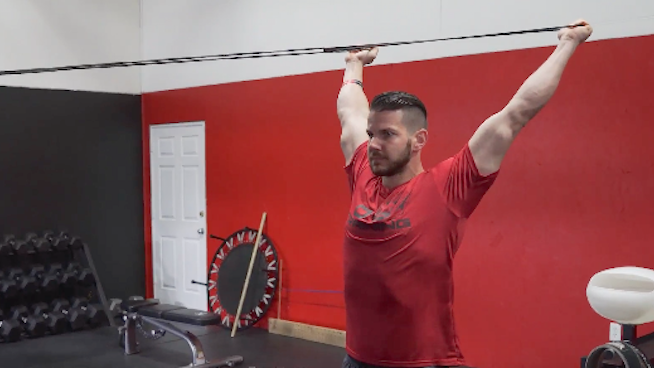
This shoulder exercise is a three-step process. Step one is to pull the band horizontally towards your face, driving the elbows back as far as you can. Once you’ve reached the end range of this movement, “flip” your wrists up by externally rotating at the shoulder. This will create a sort of “goal post” sign with your arms. The final step is to press the band into the air in a Y pattern and really focus on using the middle and lower traps to keep tension on the band as you press up. The band may look small but this exercise is guaranteed to torture and test the limits of your shoulders.
TRX Face Pull
See move at 1:25 mark of above video
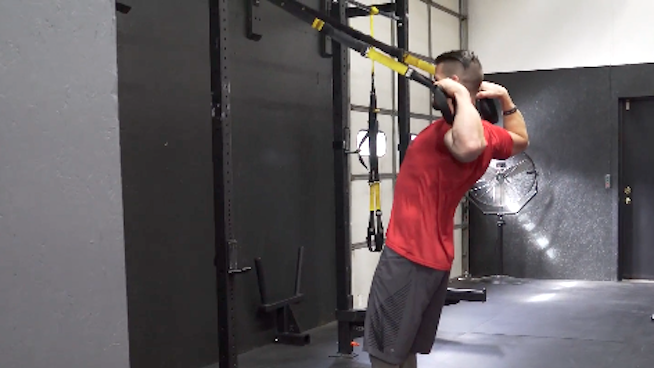
The set up for this shoulder exercise is very similar to the common TRX Row with the main difference being that you are slightly more vertical and have your arms in an elevated position. Even though the arms are in an elevated position you still want to have the shoulder blades pulled down and back to maintain good posture and use the right muscles. From the start position, pull your elbows back keeping your arms high so your fists pass right by your face. Again, the key here is to allow the upper back and posterior muscles of your shoulder to do all the work. Do your best to keep your shoulders down throughout the movement and avoid “shrugging” them up at any point.
TRX Y-Press
See move at 1:41 mark of above video
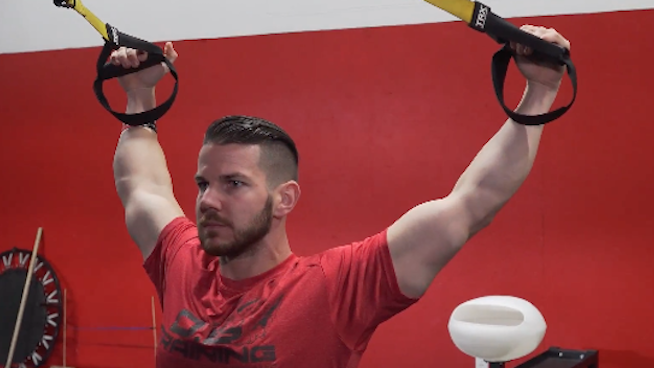
Here we go again with those upper back muscles . . . .They should be on fire by now. Set up just like the TRX Face Pull but instead of bending your elbows keep them straight throughout the movement. Raise your arms above your head as if your driving the back side of your hands directly over your head and back towards the wall in a Y pattern. As always, focus on keeping the shoulders down and back and pulling with the muscles in your upper back.
KB Alternating Press
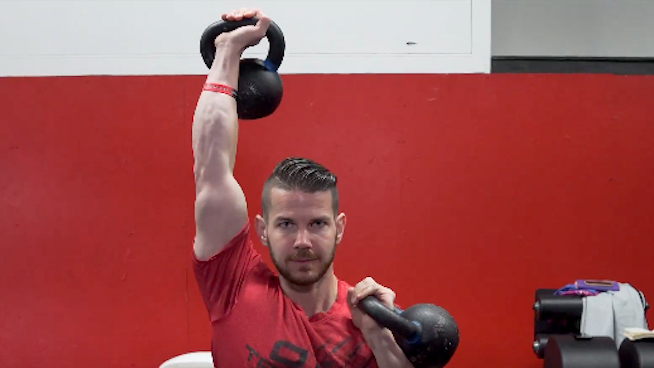
See move at 1:58 mark of above video
Finally! The pressing you’ve all been waiting for.
Now that the backside of your shoulders are warmed up and your positioning is correct, it’s time to start pressing some weights overhead. I personally like the KB press because it challenges your shoulders in strength, stability and mobility all at once. This is very humbling for most but also insures that the positioning of your shoulders and scapulas are correct throughout the whole movement…because if they’re not….you won’t be able to do the weight. As you press the weight to he top be sure to keep those shoulders down and back (you should have that nailed down by now) and hold the lockout at the top for a second or two to make sure the weight is stable. When lowering the kettle bell down you always want to finish with the thumb tight to the chest to be sure that the weight does not “flop” over and pull your shoulder in a dangerous way.
Kettlebell Halo
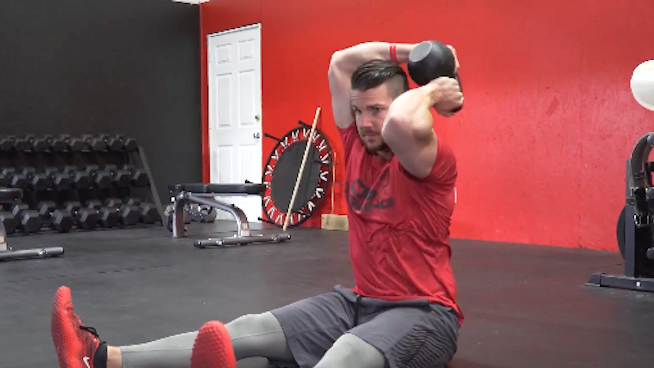
See move at 2:12 mark of above video
Strength + Mobility Wins.
Again, the focus of this exercise is not just strength but also being mobile enough to hit all of the key positions throughout the movement. Start with the kettlebell in front of you and then rotate and twist it around your head in a circular fashion until you return back to the starting point. Repeat reputations on both sides to take advantage of all the strength and mobility benefits.
You will notice that many of the exercises presented above target the posterior side of the shoulder girdle and for good reason. The majority of people, athletes especially, are anteriorly dominant which creates a rounded shoulder look but more importantly can cause impingement problems in the shoulder. This is commonly a result of too much pressing, too little pulling and poor posture over long periods of time. Long term, this anterior dominance can lead to a ton of shoulder issues and unwanted pain. To combat that, we attack the shoulders from the backside first and focus a lot of our efforts on developing the posterior shoulder and upper back musculature. Unfortunately, these aren’t the muscles that you see in the mirror but trust me if you want the boulder shoulder look and want your shoulders to stay healthy you need to have a solid foundation.
READ MORE:
RECOMMENDED FOR YOU
MOST POPULAR
8 Exercises For Strong and Healthy Shoulders
Everyone wants to have those big, broad “boulder” shoulders.
The problem is that there tends to be a good amount of aches and pain that come with the traditional training required to get them.
Imagine if you could get those big strong shoulders while also actually reducing the amount of shoulder pain you experience? The good news is it’s possible, you just have to train the shoulders a little bit different than usual–you’ve got to get a little unconventional. You also have to really develop the whole shoulder in all planes of motion, especially the back side of the shoulders and upper back.
Here’s a breakdown of the top 8 shoulder exercises we use with our athletes to not only develop those big strong shoulders, but to also keep them healthy, too.
Landmine Raise

See move at the :11 mark of above video
The Landmine Raise is a great alternative to your typical Lateral Raise shoulder exercise performed with dumbbells. By using the Landmine, the path of the weight when pulled is actually in an up-and-back angle which forces you to use the lateral and posterior heads of your deltoids. This takes some of the pressure off the front side of your deltoids and reduces the risk of pinching which commonly occurs in the shoulder joint.
Band Pull Apart

See move at :26 mark of above video
This is probably my favorite upper back and shoulder exercise to help reduce the incidence of pain while pressing. The key here is to keep the shoulder blades pulled down and back while you perform this exercise so the upper traps do not take over. Really focus on engaging the lower traps as you attempt to pull the band through your body.
Band Reverse Fly

See move at :42 mark of above video
Another great exercise for building the upper back and posterior side of the shoulders. Loop a band around a pole and simply slide your two arms inside of the looped band. From here you want to keep the arms at a 90 degree angle and “open” the arms trying to bring the two points of your elbows together as you pull back. The placement of the band on the edge of the wrist creates an additional training effect by forcing your external rotators to stay activated throughout the movement in order to keep the 90-degree angle. Some people may struggle with this. To modify, simply move the band closer to the elbow.
Band Face Pull / Y-Press

See move at 1:02 mark of above video
This shoulder exercise is a three-step process. Step one is to pull the band horizontally towards your face, driving the elbows back as far as you can. Once you’ve reached the end range of this movement, “flip” your wrists up by externally rotating at the shoulder. This will create a sort of “goal post” sign with your arms. The final step is to press the band into the air in a Y pattern and really focus on using the middle and lower traps to keep tension on the band as you press up. The band may look small but this exercise is guaranteed to torture and test the limits of your shoulders.
TRX Face Pull

See move at 1:25 mark of above video
The set up for this shoulder exercise is very similar to the common TRX Row with the main difference being that you are slightly more vertical and have your arms in an elevated position. Even though the arms are in an elevated position you still want to have the shoulder blades pulled down and back to maintain good posture and use the right muscles. From the start position, pull your elbows back keeping your arms high so your fists pass right by your face. Again, the key here is to allow the upper back and posterior muscles of your shoulder to do all the work. Do your best to keep your shoulders down throughout the movement and avoid “shrugging” them up at any point.
TRX Y-Press

See move at 1:41 mark of above video
Here we go again with those upper back muscles . . . .They should be on fire by now. Set up just like the TRX Face Pull but instead of bending your elbows keep them straight throughout the movement. Raise your arms above your head as if your driving the back side of your hands directly over your head and back towards the wall in a Y pattern. As always, focus on keeping the shoulders down and back and pulling with the muscles in your upper back.
KB Alternating Press

See move at 1:58 mark of above video
Finally! The pressing you’ve all been waiting for.
Now that the backside of your shoulders are warmed up and your positioning is correct, it’s time to start pressing some weights overhead. I personally like the KB press because it challenges your shoulders in strength, stability and mobility all at once. This is very humbling for most but also insures that the positioning of your shoulders and scapulas are correct throughout the whole movement…because if they’re not….you won’t be able to do the weight. As you press the weight to he top be sure to keep those shoulders down and back (you should have that nailed down by now) and hold the lockout at the top for a second or two to make sure the weight is stable. When lowering the kettle bell down you always want to finish with the thumb tight to the chest to be sure that the weight does not “flop” over and pull your shoulder in a dangerous way.
Kettlebell Halo

See move at 2:12 mark of above video
Strength + Mobility Wins.
Again, the focus of this exercise is not just strength but also being mobile enough to hit all of the key positions throughout the movement. Start with the kettlebell in front of you and then rotate and twist it around your head in a circular fashion until you return back to the starting point. Repeat reputations on both sides to take advantage of all the strength and mobility benefits.
You will notice that many of the exercises presented above target the posterior side of the shoulder girdle and for good reason. The majority of people, athletes especially, are anteriorly dominant which creates a rounded shoulder look but more importantly can cause impingement problems in the shoulder. This is commonly a result of too much pressing, too little pulling and poor posture over long periods of time. Long term, this anterior dominance can lead to a ton of shoulder issues and unwanted pain. To combat that, we attack the shoulders from the backside first and focus a lot of our efforts on developing the posterior shoulder and upper back musculature. Unfortunately, these aren’t the muscles that you see in the mirror but trust me if you want the boulder shoulder look and want your shoulders to stay healthy you need to have a solid foundation.
READ MORE:

