Soccer Players: Improve Your Ball Handling With 2 Simple Drills
There’s nothing more deflating to a soccer team than a player who continually loses the ball in crucial moments. In order to earn your teammates’ trust, you need to handle the ball with confidence. This will allow you to move the ball around the field and set up your teammates for success. If you can’t properly control the ball, you won’t be able to make the perfect pass or put the perfect shot on goal.
There are many ways you can work on improving your ball control. The most important thing to remember when choosing which exercises and drills to use to improve your soccer ball handling is that repetition is key. Practicing various exercises and drills multiple times until you master them is what will lead to better ball handling and control. Before we get into two simple drills that are sure to improve your ball control, here are some basic tips to remember.
The best soccer players are proficient with both feet. You will never be able to be great if you aren’t able to switch feet at a moment’s notice to elude a defender or make a last-second pass. The biggest problem I see in youth soccer is a player taking too much time to set up their dominant foot to make a pass or take a shot. This leaves the defense enough time to step in front and steal or deflect the ball. Using only your dominant foot also makes it easier for the defense or keeper to read your pass/shot and easily adjust to where the ball is going.
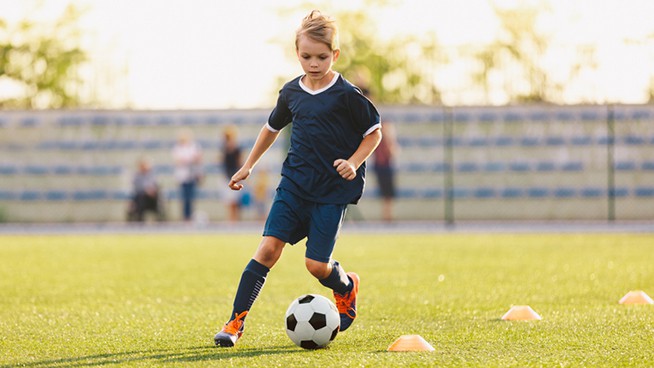
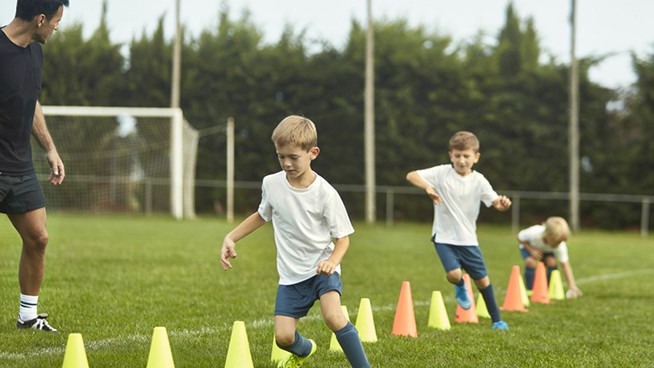
The best way I’ve found to get stronger with your opposite foot is to practice dribbling the length of the field using only your non-dominant foot and alternating inside and outside touches. Once you feel comfortable with basic dribbling, you can set up a line of cones 3 feet apart and practice weaving in and out of them. As you progress, set up cones that make you shift and change direction at each spot using different areas of your non-dominant foot to control the ball.
Remember that you need to practice receiving the ball and making passes with the opposite foot as well. The easiest way to get better at this is by doing it. Pick a day when you know you’ll be training and only use your non-dominant foot. On certain shooting drills, don’t allow yourself to use your primary foot. It will take time to develop, but after time, it will become second nature.
The best soccer ball handlers also juggle often. This tip is pretty simple, but often overlooked because of its simplicity. An easy training tool is to simply try to register one more touch than your previous juggling high score. Using both feet and knees as well as both sides of your chest and head to juggle will allow you to develop a soft touch and get a better feel for the ball. This will translate well into real game touches when you receive a pass or have to volley the ball off of a high pass. Juggling can easily be turned into a competition with teammates or a game played together by passing volleys to each other.
The best soccer ball handlers also stay on their toes! This is another simple tip, but many players fail to do it. By staying on your toes, you allow yourself to receive a pass, take a shot or move in any direction once you have the ball. By standing flat-footed or landing on your heels, you will be slow to the ball and unable to change direction quickly.
The Four Goal Drill
- Set up four cones in a small square. Each side of the square should be roughly 4 feet long.
- Next, set up four small goals—one in the middle of each side. If you don’t have access to small goals, set a pair of cones 2 feet to act as goals. )
- Mentally label the goals number 1-4 (the specific order you want to do this is up to you).
- Stand in the center of the square and have a teammate or coach stand outside the square and roll the ball to you.
- Receive the ball with your dominant foot and have the passer call out a number.
- Quickly turn and use the opposite foot to pass/shoot the ball into the goal. Limit yourself to two total touches, the initial touch to receive and the shot into the goal.
- Repeat for 30 seconds and try and total as many goals as you can.
This will help increase your first touch, develop your non-dominant foot and teach you to stay alert and on your toes. To make the game more difficult, space the goals further away and make the square larger. This will require you to shoot further/more accurate shots and settle passes that are coming in with more velocity.
Two-Footed Ball Control Circuit
This second drill is a series of ball movements you can work anywhere, anytime—even in a hallway of your home (just don’t blame us if you break something).
- To start, grab a ball and alternating tapping the top of the ball with the sole of your dominant foot and the sole of your non-dominant foot.
- Quickly switch back and forth tapping the top of the ball. You can do this drill timed or for a set number of repetitions—I prefer the challenge of seeing how many taps I can accomplish in 30 seconds.
- As soon as you’re done with toe taps, use the inside of your dominant foot and pass it quickly to the inside of your non-dominant foot.
- Repeat this back and forth, making small passes as quickly as possible. You’ll likely move forward as you perform this drill, so it’s important to keep your head and eyes up. You can do this drill timed or for a set of number of repetitions—I prefer the challenge of seeing how many passes I can accomplish in 30 seconds.
- Finally, use the sole of your dominant foot to roll over the ball.
- Roll 5-10 times with your dominant foot and then move back in the opposite direction by rolling the ball 5-10 times with your non-dominant foot.
My favorite way to utilize this circuit is by performing each drill for 30 seconds then moving to the next drill. Written out, it looks like this:
- Alternating top-of-ball taps: As Many Reps as Possible in 30 seconds
- Alternating inside-of-the-foot passes: As Many Reps as Possible in 30 seconds
- Alternating ball rolls (5-10 reps with dominant foot followed by 5-10 reps with non-dominant foot): As Many Reps as Possible in 30 seconds
Repeat this circuit 5-10 times.
If you consistently use these tips and drills, you’ll soon find you’re able to control the ball much better and gain confidence with your non-dominant foot. Being able to use both feet to control the ball is a skill, and a recent study found that skill—more than speed, strength, endurance or size—is the number one predictor of soccer performance.
Photo Credit: isitsharp/iStock
READ MORE:
RECOMMENDED FOR YOU
Soccer Players: Improve Your Ball Handling With 2 Simple Drills
There’s nothing more deflating to a soccer team than a player who continually loses the ball in crucial moments. In order to earn your teammates’ trust, you need to handle the ball with confidence. This will allow you to move the ball around the field and set up your teammates for success. If you can’t properly control the ball, you won’t be able to make the perfect pass or put the perfect shot on goal.
There are many ways you can work on improving your ball control. The most important thing to remember when choosing which exercises and drills to use to improve your soccer ball handling is that repetition is key. Practicing various exercises and drills multiple times until you master them is what will lead to better ball handling and control. Before we get into two simple drills that are sure to improve your ball control, here are some basic tips to remember.
The best soccer players are proficient with both feet. You will never be able to be great if you aren’t able to switch feet at a moment’s notice to elude a defender or make a last-second pass. The biggest problem I see in youth soccer is a player taking too much time to set up their dominant foot to make a pass or take a shot. This leaves the defense enough time to step in front and steal or deflect the ball. Using only your dominant foot also makes it easier for the defense or keeper to read your pass/shot and easily adjust to where the ball is going.
The best way I’ve found to get stronger with your opposite foot is to practice dribbling the length of the field using only your non-dominant foot and alternating inside and outside touches. Once you feel comfortable with basic dribbling, you can set up a line of cones 3 feet apart and practice weaving in and out of them. As you progress, set up cones that make you shift and change direction at each spot using different areas of your non-dominant foot to control the ball.
Remember that you need to practice receiving the ball and making passes with the opposite foot as well. The easiest way to get better at this is by doing it. Pick a day when you know you’ll be training and only use your non-dominant foot. On certain shooting drills, don’t allow yourself to use your primary foot. It will take time to develop, but after time, it will become second nature.
The best soccer ball handlers also juggle often. This tip is pretty simple, but often overlooked because of its simplicity. An easy training tool is to simply try to register one more touch than your previous juggling high score. Using both feet and knees as well as both sides of your chest and head to juggle will allow you to develop a soft touch and get a better feel for the ball. This will translate well into real game touches when you receive a pass or have to volley the ball off of a high pass. Juggling can easily be turned into a competition with teammates or a game played together by passing volleys to each other.
The best soccer ball handlers also stay on their toes! This is another simple tip, but many players fail to do it. By staying on your toes, you allow yourself to receive a pass, take a shot or move in any direction once you have the ball. By standing flat-footed or landing on your heels, you will be slow to the ball and unable to change direction quickly.
The Four Goal Drill
- Set up four cones in a small square. Each side of the square should be roughly 4 feet long.
- Next, set up four small goals—one in the middle of each side. If you don’t have access to small goals, set a pair of cones 2 feet to act as goals. )
- Mentally label the goals number 1-4 (the specific order you want to do this is up to you).
- Stand in the center of the square and have a teammate or coach stand outside the square and roll the ball to you.
- Receive the ball with your dominant foot and have the passer call out a number.
- Quickly turn and use the opposite foot to pass/shoot the ball into the goal. Limit yourself to two total touches, the initial touch to receive and the shot into the goal.
- Repeat for 30 seconds and try and total as many goals as you can.
This will help increase your first touch, develop your non-dominant foot and teach you to stay alert and on your toes. To make the game more difficult, space the goals further away and make the square larger. This will require you to shoot further/more accurate shots and settle passes that are coming in with more velocity.
Two-Footed Ball Control Circuit
This second drill is a series of ball movements you can work anywhere, anytime—even in a hallway of your home (just don’t blame us if you break something).
- To start, grab a ball and alternating tapping the top of the ball with the sole of your dominant foot and the sole of your non-dominant foot.
- Quickly switch back and forth tapping the top of the ball. You can do this drill timed or for a set number of repetitions—I prefer the challenge of seeing how many taps I can accomplish in 30 seconds.
- As soon as you’re done with toe taps, use the inside of your dominant foot and pass it quickly to the inside of your non-dominant foot.
- Repeat this back and forth, making small passes as quickly as possible. You’ll likely move forward as you perform this drill, so it’s important to keep your head and eyes up. You can do this drill timed or for a set of number of repetitions—I prefer the challenge of seeing how many passes I can accomplish in 30 seconds.
- Finally, use the sole of your dominant foot to roll over the ball.
- Roll 5-10 times with your dominant foot and then move back in the opposite direction by rolling the ball 5-10 times with your non-dominant foot.
My favorite way to utilize this circuit is by performing each drill for 30 seconds then moving to the next drill. Written out, it looks like this:
- Alternating top-of-ball taps: As Many Reps as Possible in 30 seconds
- Alternating inside-of-the-foot passes: As Many Reps as Possible in 30 seconds
- Alternating ball rolls (5-10 reps with dominant foot followed by 5-10 reps with non-dominant foot): As Many Reps as Possible in 30 seconds
Repeat this circuit 5-10 times.
If you consistently use these tips and drills, you’ll soon find you’re able to control the ball much better and gain confidence with your non-dominant foot. Being able to use both feet to control the ball is a skill, and a recent study found that skill—more than speed, strength, endurance or size—is the number one predictor of soccer performance.
Photo Credit: isitsharp/iStock
READ MORE:

