Sports Photography for Parents, Pt. 2: Take Great Action Shots
Welcome to STACK’s short series on basic sports photography for parents. In each of these quick articles, we will do our best to provide tips and advice on how youth sports parents can get great looking photos of their favorite young superstars.
Part 2 will teach you how to maximize your chances of capturing great sports action shots.
Get Close to the Action
The biggest key to getting good sports action photographs (or really any good photos) is to get as close to the subject as possible. This can be difficult to accomplish when your kid is playing on a large field. You can’t run out onto the field or court to get that one perfect shot. So you have to do what you can.
Understand where you can go as a spectator and use those locations to your advantage. If you want to get good shots, you can’t be bashful. Every sport and league has rules on where you can stand while the game is going on. A T-ball game is going to be a pretty relaxed event (or at least it should be), while a varsity state playoff game is going to have many more restrictions. It’s a good idea to speak briefly with the referee or umpire and the coach of the home team to see if they have problems with you being in one place or another.
I was once nearly booted from a varsity soccer match in Indiana because I tried to shoot photos from behind the net. Since then, I’ve seen plenty of shooters take that position with no issue, but that particular official that day considered me to be a distraction so he gave me the option to move or go home.
Be Transparent
Rule No. 1 for parents shooting sports photography is “don’t get in the way.” That includes hindering the performance of the athletes, coaches, officials, event staff and even professional photographers working for credentialed media outlets.
It also means not being a distraction to the other parents and fans in the stands. You may be well-meaning and have noble intentions of shooting pics of all the players, not just your own kid, but no one is going to appreciate you standing in their way when they’re trying to watch the game.
Where to Stand When Shooting Sports Action
Here are some examples of good places to set up when shooting certain sports:
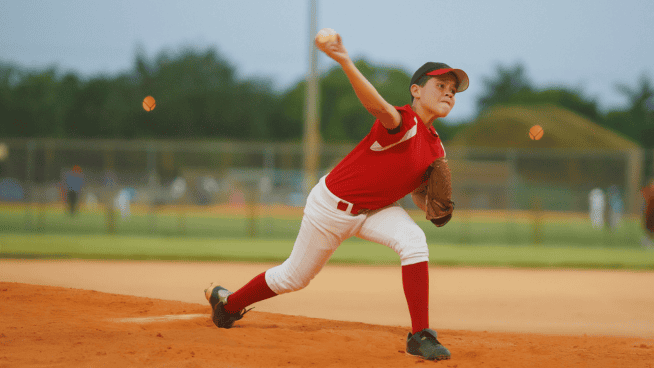
Baseball/Softball: Behind third base gives great angles for shooting right-handed pitchers, left-handed batters and tight defensive plays at all three bases. Switch over to first base and get those lefty pitchers and right-handed hitters.
Basketball: Your best spot is along the baseline and directly under the basket. It’s probably a good idea to get permission before you set up there, especially if you’re shooting high school games.
Football: Have you ever noticed that yellow dotted line just outside the sidelines and behind the end zones? That’s the area in which photographers are allowed to shoot. You pretty much can go anywhere you want, but you can’t invade the bench area of either team, unless you have special permission from that team’s coach
Volleyball: Baselines and corners give you good angles, but you really risk being in the way. The few instances of when I shot volleyball I did it from the sideline angled toward the team I was shooting so I could get good shots of players rising above the net.
Track & Field: You might need a photo pass from the school or team to allow full access, but the rule here is just don’t get in the way.
Let the Game Come to You
Shoot toward athletes’ faces. This sounds obvious, but you might be surprised at how often parents wind up with shots of their kids’ backs because they are out of position. When shooting football, for example, set up downfield from the play and get the action coming toward you. Same with soccer, basketball, track and every other sport in which there’s forward movement. Don’t be behind the play, unless you’re specifically shooting the defense, in which the rule still applies—you’re trying to get faces in the frame.
Anticipate, Be Quick (or Lucky)
The cool part about newer smartphone cameras is that they do a pretty good job of capturing movement. And that’s awesome when you’re trying to shoot fast action on the field. But to get those really great shots, you need to anticipate what’s going to happen and (hopefully) click that shutter at just the precise moment to capture that fantastic goal or spectacular one-handed catch.
Some devices allow you to click one frame after another quickly or they offer “burst mode,” which rapidly takes a series of photos so you can select the exact frame you want.
Another trick is to shoot high-def video and then freeze a frame and screenshot the image in the editing phase. This gives you the ability to shoot a lot of action and pull a series of frames without having to be quick enough to capture those precise moments. The quality can sometimes be a little less when you’re doing this, but sometimes getting that “ONE” shot is worth the tradeoff.
Photo Credit: Shoji Fujita
READ MORE:
RECOMMENDED FOR YOU
Sports Photography for Parents, Pt. 2: Take Great Action Shots
Welcome to STACK’s short series on basic sports photography for parents. In each of these quick articles, we will do our best to provide tips and advice on how youth sports parents can get great looking photos of their favorite young superstars.
Part 2 will teach you how to maximize your chances of capturing great sports action shots.
Get Close to the Action
The biggest key to getting good sports action photographs (or really any good photos) is to get as close to the subject as possible. This can be difficult to accomplish when your kid is playing on a large field. You can’t run out onto the field or court to get that one perfect shot. So you have to do what you can.
Understand where you can go as a spectator and use those locations to your advantage. If you want to get good shots, you can’t be bashful. Every sport and league has rules on where you can stand while the game is going on. A T-ball game is going to be a pretty relaxed event (or at least it should be), while a varsity state playoff game is going to have many more restrictions. It’s a good idea to speak briefly with the referee or umpire and the coach of the home team to see if they have problems with you being in one place or another.
I was once nearly booted from a varsity soccer match in Indiana because I tried to shoot photos from behind the net. Since then, I’ve seen plenty of shooters take that position with no issue, but that particular official that day considered me to be a distraction so he gave me the option to move or go home.
Be Transparent
Rule No. 1 for parents shooting sports photography is “don’t get in the way.” That includes hindering the performance of the athletes, coaches, officials, event staff and even professional photographers working for credentialed media outlets.
It also means not being a distraction to the other parents and fans in the stands. You may be well-meaning and have noble intentions of shooting pics of all the players, not just your own kid, but no one is going to appreciate you standing in their way when they’re trying to watch the game.
Where to Stand When Shooting Sports Action
Here are some examples of good places to set up when shooting certain sports:
Baseball/Softball: Behind third base gives great angles for shooting right-handed pitchers, left-handed batters and tight defensive plays at all three bases. Switch over to first base and get those lefty pitchers and right-handed hitters.
Basketball: Your best spot is along the baseline and directly under the basket. It’s probably a good idea to get permission before you set up there, especially if you’re shooting high school games.
Football: Have you ever noticed that yellow dotted line just outside the sidelines and behind the end zones? That’s the area in which photographers are allowed to shoot. You pretty much can go anywhere you want, but you can’t invade the bench area of either team, unless you have special permission from that team’s coach
Volleyball: Baselines and corners give you good angles, but you really risk being in the way. The few instances of when I shot volleyball I did it from the sideline angled toward the team I was shooting so I could get good shots of players rising above the net.
Track & Field: You might need a photo pass from the school or team to allow full access, but the rule here is just don’t get in the way.
Let the Game Come to You
Shoot toward athletes’ faces. This sounds obvious, but you might be surprised at how often parents wind up with shots of their kids’ backs because they are out of position. When shooting football, for example, set up downfield from the play and get the action coming toward you. Same with soccer, basketball, track and every other sport in which there’s forward movement. Don’t be behind the play, unless you’re specifically shooting the defense, in which the rule still applies—you’re trying to get faces in the frame.
Anticipate, Be Quick (or Lucky)
The cool part about newer smartphone cameras is that they do a pretty good job of capturing movement. And that’s awesome when you’re trying to shoot fast action on the field. But to get those really great shots, you need to anticipate what’s going to happen and (hopefully) click that shutter at just the precise moment to capture that fantastic goal or spectacular one-handed catch.
Some devices allow you to click one frame after another quickly or they offer “burst mode,” which rapidly takes a series of photos so you can select the exact frame you want.
Another trick is to shoot high-def video and then freeze a frame and screenshot the image in the editing phase. This gives you the ability to shoot a lot of action and pull a series of frames without having to be quick enough to capture those precise moments. The quality can sometimes be a little less when you’re doing this, but sometimes getting that “ONE” shot is worth the tradeoff.
Photo Credit: Shoji Fujita
READ MORE:


