4 Ways to Take Care of Your Throwing Arm
Over the course of a baseball season, a player’s throwing arm is placed under a tremendous amount of stress. Approximately 70 percent of high school baseball players experience some form of upper-arm pain that limits their participation.[2] The source of pain may be attributed to a number of factors, including eccentric stress when decelerating the arm, valgus stress with increased “lay back,” shoulder girdle impingements, and/or any form of shoulder blade dysfunction. (Learn more shoulder injury prevention tips.) This may sound complex, but it’s important to understand that the shoulder can be hurt in multiple ways.
With such a fragile part of the body under constant stress, it is imperative to have a plan for taking care of your throwing arm to stay healthy throughout a season. The acronym “RAMS”—for Recovery, Activation, Mobility, Strengthening—provides an easy way to implement consistent and effective methods to keep your arm feeling strong and without pain.
R for Recovery
It’s critical to have a post-game or post-bullpen session to reduce inflammation of any damaged tissue. Three quick and easy strategies to take care of your throwing arm are simply to:
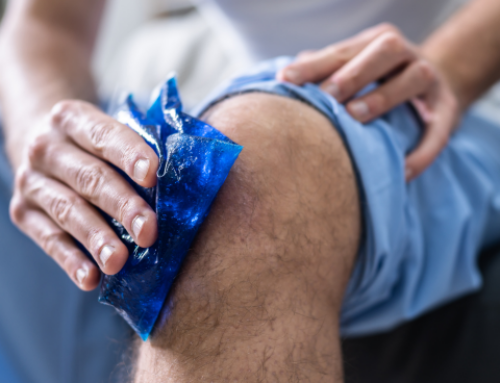
- Ice (20 minutes initially).
- Foam roll areas prone to tightening up, including the lats, rear shoulder, groin, low back and glutes. (Try this foam rolling routine).
- Perform a light soft tissue massage with either a tennis ball or a lacrosse ball to directly target smaller areas, including the forearms, triceps, rear delts and hip flexors.
A for Activation
You must activate your shoulder muscles 24 hours after a game or throwing session to increase blood flow to damaged tissue and expedite the rebuilding process. Achieve this by performing rotator cuff and scapular stabilizing exercises. Try these three movements.
Standing “W”
- Stand in an athletic position holding a band at shoulder-width with your thumbs up and palms facing each other.
- Keeping your elbows bent at 90 degrees and tucked to your sides, simultaneously pull your shoulder blades back and externally rotate your shoulders.
- Continue pulling your hands back to form a “W” with your arms.
Sets/Reps: 2-3×8-12
Coaching Points: Focus on retracting your scaps and keeping your elbows tight to your body // Keep your palms in a neutral position (not facing up).
Plank Circles
- Assume a push-up position on a non-stick surface, placing your hands on two separate towels (or use Cal slides, furniture movers, slide board, etc.).
- Keeping your back straight and your body in a straight line, make small circles clockwise with one arm for specified reps.
- Perform the specified reps in the opposite direction.
- Switch hands and repeat.
Sets/Reps: 2-3×5-10 each arm
Coaching Points: Maintain a neutral spine with yours hands centered directly underneath yours shoulders // Keep your weight balanced on both arms // Keep your hips squared to the floor
Scap Push-Up
- Assume a push-up position with your hands directly under your shoulders.
- Pull your shoulder blades back fully without bending your elbows or letting your hips sag.
- Push your shoulders forward as far as possible.
- Repeat for specified reps.
Sets/Reps: 1-2×8-12
Coaching Points: Keep your body in a straight line // Plant your palms firmly on the ground and drive your weight through the balls of your feet.
M for Mobility
It’s extremely important to address areas of the body that are prone to losing flexibility, such as shoulder internal rotation and thoracic spine mobility.[1] Here are two movements to help you maintain optimal mobility after a throwing session.
Thoracic Spine Crunches on T-Spine Ball
- Place a T-spine ball (two tennis balls taped together) in the middle of your back at the same level as your sternum. Keep your low back flat and hips on the ground.
- Extend your arms straight up over your chest and elevate your shoulders off the ground slightly to apply more pressure to the T-spine ball.
- Lower to the ground and repeat for specified reps.
Sets/Reps: 1-2×10-15
Coaching Points: Try to touch your chin to the ceiling as your shoulders elevate and your hands reach up // Your back may feel tender initially
Kneeling Groin Stretch
- Kneel on one knee and place your opposite leg directly to the side with your toes pointed straight ahead.
- Place your hands on the ground in front and keep your back flat to form a “table-top” position.
- Shift your weight to the heel of your kneeling leg. Stop when you are unable to maintain a flat back.
- Hold for 10-20 seconds, then shift your weight forward to your hands.
Sets/Reps: 1-2×8-10 each side
Coaching Points: Arch your low back as you shift back toward your heel to enable a deeper stretch through the groin and to identify the end range of motion
S for Strengthening
This is without a doubt the most essential aspect of maintaining a healthy arm. Without an adequate level of strength, your arm doesn’t have a chance of combating extreme stress over the course of a season. Here are two horizontal rowing variations you can add to your strength program to help increase lower trap activation and scapular strength, which will help stabilize your shoulder..
Side Plank Retraction Row
- Assume a side plank position facing a cable machine with your bottom elbow directly under your shoulder.
- Grasp the cable handle with your top hand with your arm fully extended in front of your chest.
- Pull your shoulder blade back and row the cable handle to your armpit. Hold for specified duration.
Sets/Duration: 2-3×20-40 seconds (or do this for 10-12 reps instead of time)
Coaching Points: Maintain a straight line from your head to your toes // Keep your shoulder blade retracted without letting it drift up towards your ear
Kneeling Iso-Rear Delt
- Secure two bands to a railing or fence, or use an independent cable system.
- Kneel down facing the attachment point and hold the bands with an underhand grip.
- Pull one arm back so your elbow is at 90 degrees, and keep it pinched to your side.
- Perform rows with your opposite arm for specified reps.
- Repeat on the opposite side.
Sets/Reps: 2-3×8-12 each arm
Coaching Points: Keep your core and glutes engaged // Finish the row with your palms up // Do not let your elbows go past your torso
References
[1] Laudner, K. G., Lynall, R., & Meister, K. (2012). “Shoulder adaptations among pitchers and position players over the course of a competitive baseball season.” Clinical Journal of Sports Medicine, Retrieved from http://www.ncbi.nlm.nih.gov.p.atsu.edu/pubmed/?term=Shoulder Adaptations Among Pitchers and Position Players Over the Course of a Competitive Baseball Season. [2] Meyers , J. B., Oyama, S., & Hibberd, E. E. (2013). “Scapular dysfunction in high school baseball players sustaining throwing-related upper extremity injury: a prospective study.” Journal of Shoulder and Elbow Surgery, Retrieved from http://dx.doi.org/10.1016/j.jse.2012.12.029RECOMMENDED FOR YOU
MOST POPULAR
4 Ways to Take Care of Your Throwing Arm
Over the course of a baseball season, a player’s throwing arm is placed under a tremendous amount of stress. Approximately 70 percent of high school baseball players experience some form of upper-arm pain that limits their participation.[2] The source of pain may be attributed to a number of factors, including eccentric stress when decelerating the arm, valgus stress with increased “lay back,” shoulder girdle impingements, and/or any form of shoulder blade dysfunction. (Learn more shoulder injury prevention tips.) This may sound complex, but it’s important to understand that the shoulder can be hurt in multiple ways.
With such a fragile part of the body under constant stress, it is imperative to have a plan for taking care of your throwing arm to stay healthy throughout a season. The acronym “RAMS”—for Recovery, Activation, Mobility, Strengthening—provides an easy way to implement consistent and effective methods to keep your arm feeling strong and without pain.
R for Recovery
It’s critical to have a post-game or post-bullpen session to reduce inflammation of any damaged tissue. Three quick and easy strategies to take care of your throwing arm are simply to:
- Ice (20 minutes initially).
- Foam roll areas prone to tightening up, including the lats, rear shoulder, groin, low back and glutes. (Try this foam rolling routine).
- Perform a light soft tissue massage with either a tennis ball or a lacrosse ball to directly target smaller areas, including the forearms, triceps, rear delts and hip flexors.
A for Activation
You must activate your shoulder muscles 24 hours after a game or throwing session to increase blood flow to damaged tissue and expedite the rebuilding process. Achieve this by performing rotator cuff and scapular stabilizing exercises. Try these three movements.
Standing “W”
- Stand in an athletic position holding a band at shoulder-width with your thumbs up and palms facing each other.
- Keeping your elbows bent at 90 degrees and tucked to your sides, simultaneously pull your shoulder blades back and externally rotate your shoulders.
- Continue pulling your hands back to form a “W” with your arms.
Sets/Reps: 2-3×8-12
Coaching Points: Focus on retracting your scaps and keeping your elbows tight to your body // Keep your palms in a neutral position (not facing up).
Plank Circles
- Assume a push-up position on a non-stick surface, placing your hands on two separate towels (or use Cal slides, furniture movers, slide board, etc.).
- Keeping your back straight and your body in a straight line, make small circles clockwise with one arm for specified reps.
- Perform the specified reps in the opposite direction.
- Switch hands and repeat.
Sets/Reps: 2-3×5-10 each arm
Coaching Points: Maintain a neutral spine with yours hands centered directly underneath yours shoulders // Keep your weight balanced on both arms // Keep your hips squared to the floor
Scap Push-Up
- Assume a push-up position with your hands directly under your shoulders.
- Pull your shoulder blades back fully without bending your elbows or letting your hips sag.
- Push your shoulders forward as far as possible.
- Repeat for specified reps.
Sets/Reps: 1-2×8-12
Coaching Points: Keep your body in a straight line // Plant your palms firmly on the ground and drive your weight through the balls of your feet.
M for Mobility
It’s extremely important to address areas of the body that are prone to losing flexibility, such as shoulder internal rotation and thoracic spine mobility.[1] Here are two movements to help you maintain optimal mobility after a throwing session.
Thoracic Spine Crunches on T-Spine Ball
- Place a T-spine ball (two tennis balls taped together) in the middle of your back at the same level as your sternum. Keep your low back flat and hips on the ground.
- Extend your arms straight up over your chest and elevate your shoulders off the ground slightly to apply more pressure to the T-spine ball.
- Lower to the ground and repeat for specified reps.
Sets/Reps: 1-2×10-15
Coaching Points: Try to touch your chin to the ceiling as your shoulders elevate and your hands reach up // Your back may feel tender initially
Kneeling Groin Stretch
- Kneel on one knee and place your opposite leg directly to the side with your toes pointed straight ahead.
- Place your hands on the ground in front and keep your back flat to form a “table-top” position.
- Shift your weight to the heel of your kneeling leg. Stop when you are unable to maintain a flat back.
- Hold for 10-20 seconds, then shift your weight forward to your hands.
Sets/Reps: 1-2×8-10 each side
Coaching Points: Arch your low back as you shift back toward your heel to enable a deeper stretch through the groin and to identify the end range of motion
S for Strengthening
This is without a doubt the most essential aspect of maintaining a healthy arm. Without an adequate level of strength, your arm doesn’t have a chance of combating extreme stress over the course of a season. Here are two horizontal rowing variations you can add to your strength program to help increase lower trap activation and scapular strength, which will help stabilize your shoulder..
Side Plank Retraction Row
- Assume a side plank position facing a cable machine with your bottom elbow directly under your shoulder.
- Grasp the cable handle with your top hand with your arm fully extended in front of your chest.
- Pull your shoulder blade back and row the cable handle to your armpit. Hold for specified duration.
Sets/Duration: 2-3×20-40 seconds (or do this for 10-12 reps instead of time)
Coaching Points: Maintain a straight line from your head to your toes // Keep your shoulder blade retracted without letting it drift up towards your ear
Kneeling Iso-Rear Delt
- Secure two bands to a railing or fence, or use an independent cable system.
- Kneel down facing the attachment point and hold the bands with an underhand grip.
- Pull one arm back so your elbow is at 90 degrees, and keep it pinched to your side.
- Perform rows with your opposite arm for specified reps.
- Repeat on the opposite side.
Sets/Reps: 2-3×8-12 each arm
Coaching Points: Keep your core and glutes engaged // Finish the row with your palms up // Do not let your elbows go past your torso
References
[1] Laudner, K. G., Lynall, R., & Meister, K. (2012). “Shoulder adaptations among pitchers and position players over the course of a competitive baseball season.” Clinical Journal of Sports Medicine, Retrieved from http://www.ncbi.nlm.nih.gov.p.atsu.edu/pubmed/?term=Shoulder Adaptations Among Pitchers and Position Players Over the Course of a Competitive Baseball Season. [2] Meyers , J. B., Oyama, S., & Hibberd, E. E. (2013). “Scapular dysfunction in high school baseball players sustaining throwing-related upper extremity injury: a prospective study.” Journal of Shoulder and Elbow Surgery, Retrieved from http://dx.doi.org/10.1016/j.jse.2012.12.029


