The Do's and Don'ts of the Deadlift and Back Squat
If you’re trying to gain muscle, increase strength and build speed, try Deadlifts and Back Squats. These two often-recommended exercises will help you reach your performance goals. Once you integrate them into your workout, your game will never be the same.
The Deadlift and Back Squat both require much coaching to perfect, so be patient as you learn them. Having a “big Squat” won’t guarantee you a spot in the starting lineup, but a blown disc in your spine will guarantee you a spot on the bench. To gain the muscle, strength and speed you want, learn to do the movements correctly.
Warm-Up
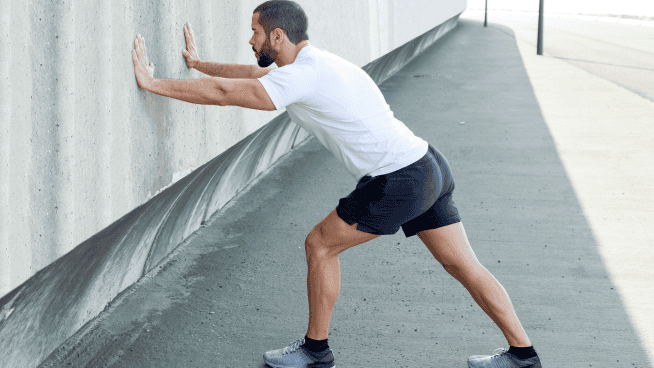
Please remember to warm up and stretch properly before starting any workout. A good warm-up should last between five and 10 minutes and generate a substantial sweat, increasing your internal core temperature. Then take 10 to 15 minutes to dynamically stretch your entire body.
The following warm-up can be performed before a strength training session that includes the Deadlift and Back Squat. The following exercises are designed to prepare the body for the specific movements you will perform in your workout. The exercises should be completed one after another and be treated as a circuit. If they are done right, your heart rate will increase and you’ll be sweaty.
- Jumping Jacks — 1×20
- Bodyweight Squats — 1×10
- High Knee Pulls — 1×5 each leg
- Single-Leg Squats — 1×5 each leg
- Front Lunges — 1×5 each side
- Single-Leg Toe Touches — 1×5 each leg
- Side Lunges — 1×5 each leg
- Push-Ups with Rotation — 1×5 each side
- Prone Back Extensions — 1×10
View the Deadlift and Squat as skills, similar to hitting a baseball, shooting a basketball or throwing a football. You need to know what’s expected in each phase and practice it over and over. Perfect your execution before you add weight.
Deadlift
Starting Position
1) Stand facing the trap bar with feet shoulder-width apart or slightly wider.
2) Flex knees until thighs are parallel to the floor. Maintain straight arms as you grasp the bar.
Upward Motion
3) Drive through heels and straighten legs. With tight abs and straight back, grab trap bar and pull up.
4) Once bar is at knees, extend torso so you are standing erect with shoulders back and arms by your side. Exhale as you complete the movement.
Downward Motion
5) Maintain a rigid back, and lower the trap bar directly in front of your shins, while bending from the knees and hips.
Execution Don’ts
- Shoot your buttocks straight up in the air
- Lean over, rather than Squat
- Roll lower back
Back Squat
Starting Position
1) Step under the bar and position feet parallel to each other.
2) Place hands on the bar, using the “high bar position” technique:
- Grasp bar with closed, pronated (overhand) grip, slightly wider than shoulder-width.
- Dip head under the bar and move body to place the bar evenly above the posterior deltoids at the base of the neck.
3) Lift elbows up to create a shelf for the bar.
4) Hold the chest up and out.
5) Pull the scapulas (shoulder blades) toward each other. Tilt your head up slightly. Once in position, signal your spotters.
6) Extend the hips and knees to lift the bar off the racks, and take one or two steps backward.
7) Position the feet shoulder-width apart or slightly wider. Keep the feet even with each other, with toes pointed straight ahead or at a slight angle.
8) Keep elbows lifted up and bar on shoulders.
Downward Motion
9) Allow the hips and knees to slowly flex while keeping the torso-to- floor angle constant.
10) Maintain position with back flat, elbows high and chest up and out.
11) Keep heels on the floor and knees aligned over the feet.
12) Allow the hips and knees to flex until one of these two events occurs (this determines your maximum range of motion):
- Thighs are parallel to the floor, or
- Trunk begins to round or flex forward.
Upward Motion
13) Extend the hips and knees at the same rate to keep the torso-to-floor angle constant. Maintain position with back flat, elbows high and chest up and out.
Execution Don’ts
- Allow the heels to lift off the floor, the torso to flex further forward or the upper back to round during the Upward Motion phase
- Allow the knees to move in (via hip adduction) or out (via hip abduction) during the movement
- Allow the arms to relax or the elbows to drop down and forward
View additional warm-up exercises, a Deadlift warm-up technique and a Squat with accommodating resistance by watching the video below.
Check out Coach Taylor’s SMARTER Team Training podcast below.
RECOMMENDED FOR YOU
MOST POPULAR
The Do's and Don'ts of the Deadlift and Back Squat
If you’re trying to gain muscle, increase strength and build speed, try Deadlifts and Back Squats. These two often-recommended exercises will help you reach your performance goals. Once you integrate them into your workout, your game will never be the same.
The Deadlift and Back Squat both require much coaching to perfect, so be patient as you learn them. Having a “big Squat” won’t guarantee you a spot in the starting lineup, but a blown disc in your spine will guarantee you a spot on the bench. To gain the muscle, strength and speed you want, learn to do the movements correctly.
Warm-Up
Please remember to warm up and stretch properly before starting any workout. A good warm-up should last between five and 10 minutes and generate a substantial sweat, increasing your internal core temperature. Then take 10 to 15 minutes to dynamically stretch your entire body.
The following warm-up can be performed before a strength training session that includes the Deadlift and Back Squat. The following exercises are designed to prepare the body for the specific movements you will perform in your workout. The exercises should be completed one after another and be treated as a circuit. If they are done right, your heart rate will increase and you’ll be sweaty.
- Jumping Jacks — 1×20
- Bodyweight Squats — 1×10
- High Knee Pulls — 1×5 each leg
- Single-Leg Squats — 1×5 each leg
- Front Lunges — 1×5 each side
- Single-Leg Toe Touches — 1×5 each leg
- Side Lunges — 1×5 each leg
- Push-Ups with Rotation — 1×5 each side
- Prone Back Extensions — 1×10
View the Deadlift and Squat as skills, similar to hitting a baseball, shooting a basketball or throwing a football. You need to know what’s expected in each phase and practice it over and over. Perfect your execution before you add weight.
Deadlift
Starting Position
1) Stand facing the trap bar with feet shoulder-width apart or slightly wider.
2) Flex knees until thighs are parallel to the floor. Maintain straight arms as you grasp the bar.
Upward Motion
3) Drive through heels and straighten legs. With tight abs and straight back, grab trap bar and pull up.
4) Once bar is at knees, extend torso so you are standing erect with shoulders back and arms by your side. Exhale as you complete the movement.
Downward Motion
5) Maintain a rigid back, and lower the trap bar directly in front of your shins, while bending from the knees and hips.
Execution Don’ts
- Shoot your buttocks straight up in the air
- Lean over, rather than Squat
- Roll lower back
Back Squat
Starting Position
1) Step under the bar and position feet parallel to each other.
2) Place hands on the bar, using the “high bar position” technique:
- Grasp bar with closed, pronated (overhand) grip, slightly wider than shoulder-width.
- Dip head under the bar and move body to place the bar evenly above the posterior deltoids at the base of the neck.
3) Lift elbows up to create a shelf for the bar.
4) Hold the chest up and out.
5) Pull the scapulas (shoulder blades) toward each other. Tilt your head up slightly. Once in position, signal your spotters.
6) Extend the hips and knees to lift the bar off the racks, and take one or two steps backward.
7) Position the feet shoulder-width apart or slightly wider. Keep the feet even with each other, with toes pointed straight ahead or at a slight angle.
8) Keep elbows lifted up and bar on shoulders.
Downward Motion
9) Allow the hips and knees to slowly flex while keeping the torso-to- floor angle constant.
10) Maintain position with back flat, elbows high and chest up and out.
11) Keep heels on the floor and knees aligned over the feet.
12) Allow the hips and knees to flex until one of these two events occurs (this determines your maximum range of motion):
- Thighs are parallel to the floor, or
- Trunk begins to round or flex forward.
Upward Motion
13) Extend the hips and knees at the same rate to keep the torso-to-floor angle constant. Maintain position with back flat, elbows high and chest up and out.
Execution Don’ts
- Allow the heels to lift off the floor, the torso to flex further forward or the upper back to round during the Upward Motion phase
- Allow the knees to move in (via hip adduction) or out (via hip abduction) during the movement
- Allow the arms to relax or the elbows to drop down and forward
View additional warm-up exercises, a Deadlift warm-up technique and a Squat with accommodating resistance by watching the video below.
Check out Coach Taylor’s SMARTER Team Training podcast below.


