What It’s Like to Recover From an MCL Injury
It was the first game of the fall season, and I was looking forward to getting back in the crease. For the last few years, I’ve been playing year-round in various leagues, but this year because of other commitments, I elected to take eight weeks off in the summer. I maintained a dedicated training schedule, but it had a different focus—and it did not address certain position-specific movements to reduce the potential for hip, ACL or MCL injury. Further complicating things, due to other conflicts, I did not get a chance to play in any pre-season games before the start of the season.
RELATED: Returning to Football After an ACL Injury: The Adrian Peterson Way
As one would expect, the opening period was scrambled—losing position and fighting the rebounds quite a bit—but I managed to get through reasonably unscathed. Unfortunately, the second period was less successful. Five minutes in, I let a rebound out to my left, which was picked up by the other forward and dragged across to the opposite side. In a move I’ve made a hundred times, I pushed off my left leg from the butterfly position to drive across to the other side—only this time, something didn’t work. My leg got stuck behind me (flexed well past 90 degrees), and as I stretched out to my right, I heard a “thunk” on the inside of my left knee. I knew immediately this was something I could not shake off, and I left the game. Taking my pads off was painful. By the time I had showered and was heading to my car, I was walking with a heavy limp, and by the time I got home, I could tolerate virtually no weight-bearing.
Luckily, I was able to get in to see a sports-med specialist the next day. I was diagnosed with a grade 2 medial collateral ligament (MCL) sprain and looking at about eight weeks before I could play again.
Naturally, I was determined to make it back as quickly as possible, so I decided to investigate the most effective and current rehabilitation protocols. Perhaps unsurprisingly, there isn’t a great deal of consensus—different philosophies and practices shape different formats to the protocols. So I opted for the “common thread” approach—whatever treatments showed up in the majority, I would implement them in my own “return to play” and, to the best of my ability, evaluate them through experience.
Here are some things to take into account when recovering from an MCL injury.
RELATED: STACK Science: How Knee Injuries Occur and How to Prevent Them
How badly has your MCL been injured?
When it is evaluated, the injury is generally categorized into one of three classifications—although there are degrees within each, depending on the amount of damage done. The amount of pain (or lack of it) is not necessarily the key factor in determining the severity of the injury. Since since the MCL has a good blood supply, it generally responds well to non-surgical treatment and intervention.
Grade 1 Sprain
- Mild severity
- No loss of ligamentous integrity (stretch injury)
- Minimal torn fibers
Grade 2 Sprain
- Moderate severity
- Partial tearing of MCL
- Increased joint laxity
- End point found at 30 degrees of flexion with valgus stress
- Fibers remain apposed
Grade 3 Sprain
- Severe
- Complete disruption of ligament (complete tear)
- Gross laxity
- No end point with valgus stress at 30 degrees of knee flexion
For all of the above, there is no definitive timeline. Expect to be working through discomfort, particularly in the early stages, but know your limits—there is a point of diminishing returns, and you don’t want to make an injury worse by pushing too fast or rushing past stages before you’re ready.
Ice or Bracing?
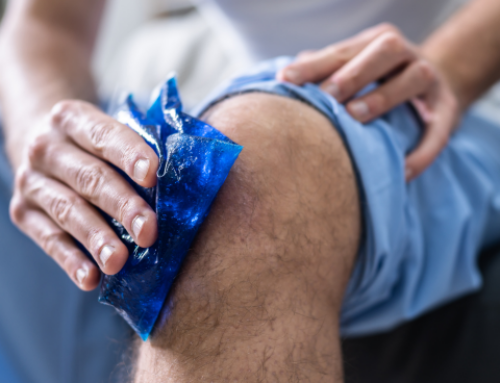
Two components of this rehab have divided support within the rehabilitation/strength and conditioning community—ice and bracing. In regards to the ice: yes, inflammation may be the body’s natural response to injury, and yes, you could argue that icing interferes with this natural reaction. However, you could also argue that inflammation is an overreaction, and using ice to bring it down may assist healing. If nothing else, its natural analgesic effect can help with pain management, so keep this possibility in mind when self-evaluating.
Bracing depends on the practitioner’s clinical experience. Some choose to brace, while others will not. Epidemiological studies thus far have proven inconclusive regarding bracing in rehabilitation and injury/re-injury prevention. On the one hand, although it might not be locked out in a limited range, it may help with acute stability. On the other, some cases may have a long-term detriment by providing a false sense of security and creating a reliance on an external base of support. This can be further complicated by imposing a limitation on performance. However, if there are efforts to strengthen the knee without this additional stabilizer during rehabilitative exercise, bracing might prove useful.
RELATED: Deceleration: The Missing Link in Speed Training
Returning to Play
Stage 1 (immediately following injury)
Status: Possible pain and swelling; difficulty with rotational movement, particularly during any sort of weight-bearing or resistance.
Protocol: Ice (although there is currently some debate on the use of ice, reduction of some inflammation and even just the analgesic effect make it worthwhile), over the counter anti-inflammatories, unloaded stationary bike for ROM.
Stage 2
Status: Still painful in movement, but manageable. Direction changes (such as going around a corner on a flight of stairs) can still produce sudden, sharp pain. Tightness on inner knee.
Protocol: Some basic stability and controlled linear movements, adding some light resistance. Examples include unloaded Single Leg Deadlifts, and assisted Single Leg Squats to a box.
Stage 3
Status: Directional changes can still elicit a pain response, but controlled multi-directional movements can be managed. Tightness on inner knee after training sessions and maybe upon waking in the morning.
Protocol: Unloaded, low speed and controlled multi-directional movements (such as a Bodyweight Lateral Lunges), loaded linear split-stance, unilateral and bilateral movements (Squats, Split-Squats, Deadlifts and Single-Leg Deadlifts). Begin to implement resisted internal rotation of the hip (such as half-kneeling resisted foot-to-midline [figure 1a/b], and Half-Kneeling Butterfly Drop [figure 2a/b]) as tolerance allows.
Stage 4
Status: Directional changes may be felt, but pain is minimal or nonexistent. Some tightness after training, and may be present after waking.
Protocol: Standard strength and conditioning program, within tolerance. Return to practice at half-speed and with control. Work your way up to full movement within practice sessions.
Stage 5
Status: Ready for return to play. Knee may still experience tightness in the mornings, and there is a possibility this will continue for an extended period after returning to the game.
This whole process actually took me 10 weeks from the initial injury, including an additional week after I felt ready, just to give myself full confidence. As a side note, I was able to get back to full speed as a player within 4 weeks—but it was another 4 weeks before I was able to go into (and successfully get up from) a butterfly position without pain or “catching.” I limited myself to practice sessions for the last two weeks before putting myself back between the wickets in a game scenario. We won my first game back, and I played with no pain, only a mild stiffness the next morning.
As previously mentioned, the timelines for each stage and for return to play can vary a great deal from athlete to athlete, and this is a summary based on common practice and personal experience. Be sure to follow the instructions of your physician and therapist, and think long-term: let your body tell you when you’re ready for each stage, and don’t push yourself too quickly, risking a re-injury and further delays in your return to play.
References:
Chen, L., Kim, P. D., Ahmad, C. S., & and Levine, W. N. (2008 June). “Medial collateral ligament injuries of the knee: current treatment concepts.” Musculoskelet Medicine , 108–113.
Jones, T. (., & McCulloch, P. (. (2014, December 12). MCL Knee Injuries. Retrieved November 25, 2015, from orthobullets.com: http://www.orthobullets.com/sports/3010/mcl-knee-injuries
Paluska, S. A., & Mckeag, D. B. (2000 January). “Knee Braces: Current Evidence and Clinical Recommendations for Their Use.” American Family Physician , 411-418.
Salata, M. J., Gibbs, A. E., & Sekiya, J. K. (2010 September). “The Effectiveness of Prophylactic Knee Bracing in American Football.” Sports Health , 375-379.
[cf]skyword_tracking_tag[/cf]RECOMMENDED FOR YOU
What It’s Like to Recover From an MCL Injury
It was the first game of the fall season, and I was looking forward to getting back in the crease. For the last few years, I’ve been playing year-round in various leagues, but this year because of other commitments, I elected to take eight weeks off in the summer. I maintained a dedicated training schedule, but it had a different focus—and it did not address certain position-specific movements to reduce the potential for hip, ACL or MCL injury. Further complicating things, due to other conflicts, I did not get a chance to play in any pre-season games before the start of the season.
RELATED: Returning to Football After an ACL Injury: The Adrian Peterson Way
As one would expect, the opening period was scrambled—losing position and fighting the rebounds quite a bit—but I managed to get through reasonably unscathed. Unfortunately, the second period was less successful. Five minutes in, I let a rebound out to my left, which was picked up by the other forward and dragged across to the opposite side. In a move I’ve made a hundred times, I pushed off my left leg from the butterfly position to drive across to the other side—only this time, something didn’t work. My leg got stuck behind me (flexed well past 90 degrees), and as I stretched out to my right, I heard a “thunk” on the inside of my left knee. I knew immediately this was something I could not shake off, and I left the game. Taking my pads off was painful. By the time I had showered and was heading to my car, I was walking with a heavy limp, and by the time I got home, I could tolerate virtually no weight-bearing.
Luckily, I was able to get in to see a sports-med specialist the next day. I was diagnosed with a grade 2 medial collateral ligament (MCL) sprain and looking at about eight weeks before I could play again.
Naturally, I was determined to make it back as quickly as possible, so I decided to investigate the most effective and current rehabilitation protocols. Perhaps unsurprisingly, there isn’t a great deal of consensus—different philosophies and practices shape different formats to the protocols. So I opted for the “common thread” approach—whatever treatments showed up in the majority, I would implement them in my own “return to play” and, to the best of my ability, evaluate them through experience.
Here are some things to take into account when recovering from an MCL injury.
RELATED: STACK Science: How Knee Injuries Occur and How to Prevent Them
How badly has your MCL been injured?
When it is evaluated, the injury is generally categorized into one of three classifications—although there are degrees within each, depending on the amount of damage done. The amount of pain (or lack of it) is not necessarily the key factor in determining the severity of the injury. Since since the MCL has a good blood supply, it generally responds well to non-surgical treatment and intervention.
Grade 1 Sprain
- Mild severity
- No loss of ligamentous integrity (stretch injury)
- Minimal torn fibers
Grade 2 Sprain
- Moderate severity
- Partial tearing of MCL
- Increased joint laxity
- End point found at 30 degrees of flexion with valgus stress
- Fibers remain apposed
Grade 3 Sprain
- Severe
- Complete disruption of ligament (complete tear)
- Gross laxity
- No end point with valgus stress at 30 degrees of knee flexion
For all of the above, there is no definitive timeline. Expect to be working through discomfort, particularly in the early stages, but know your limits—there is a point of diminishing returns, and you don’t want to make an injury worse by pushing too fast or rushing past stages before you’re ready.
Ice or Bracing?
Two components of this rehab have divided support within the rehabilitation/strength and conditioning community—ice and bracing. In regards to the ice: yes, inflammation may be the body’s natural response to injury, and yes, you could argue that icing interferes with this natural reaction. However, you could also argue that inflammation is an overreaction, and using ice to bring it down may assist healing. If nothing else, its natural analgesic effect can help with pain management, so keep this possibility in mind when self-evaluating.
Bracing depends on the practitioner’s clinical experience. Some choose to brace, while others will not. Epidemiological studies thus far have proven inconclusive regarding bracing in rehabilitation and injury/re-injury prevention. On the one hand, although it might not be locked out in a limited range, it may help with acute stability. On the other, some cases may have a long-term detriment by providing a false sense of security and creating a reliance on an external base of support. This can be further complicated by imposing a limitation on performance. However, if there are efforts to strengthen the knee without this additional stabilizer during rehabilitative exercise, bracing might prove useful.
RELATED: Deceleration: The Missing Link in Speed Training
Returning to Play
Stage 1 (immediately following injury)
Status: Possible pain and swelling; difficulty with rotational movement, particularly during any sort of weight-bearing or resistance.
Protocol: Ice (although there is currently some debate on the use of ice, reduction of some inflammation and even just the analgesic effect make it worthwhile), over the counter anti-inflammatories, unloaded stationary bike for ROM.
Stage 2
Status: Still painful in movement, but manageable. Direction changes (such as going around a corner on a flight of stairs) can still produce sudden, sharp pain. Tightness on inner knee.
Protocol: Some basic stability and controlled linear movements, adding some light resistance. Examples include unloaded Single Leg Deadlifts, and assisted Single Leg Squats to a box.
Stage 3
Status: Directional changes can still elicit a pain response, but controlled multi-directional movements can be managed. Tightness on inner knee after training sessions and maybe upon waking in the morning.
Protocol: Unloaded, low speed and controlled multi-directional movements (such as a Bodyweight Lateral Lunges), loaded linear split-stance, unilateral and bilateral movements (Squats, Split-Squats, Deadlifts and Single-Leg Deadlifts). Begin to implement resisted internal rotation of the hip (such as half-kneeling resisted foot-to-midline [figure 1a/b], and Half-Kneeling Butterfly Drop [figure 2a/b]) as tolerance allows.
Stage 4
Status: Directional changes may be felt, but pain is minimal or nonexistent. Some tightness after training, and may be present after waking.
Protocol: Standard strength and conditioning program, within tolerance. Return to practice at half-speed and with control. Work your way up to full movement within practice sessions.
Stage 5
Status: Ready for return to play. Knee may still experience tightness in the mornings, and there is a possibility this will continue for an extended period after returning to the game.
This whole process actually took me 10 weeks from the initial injury, including an additional week after I felt ready, just to give myself full confidence. As a side note, I was able to get back to full speed as a player within 4 weeks—but it was another 4 weeks before I was able to go into (and successfully get up from) a butterfly position without pain or “catching.” I limited myself to practice sessions for the last two weeks before putting myself back between the wickets in a game scenario. We won my first game back, and I played with no pain, only a mild stiffness the next morning.
As previously mentioned, the timelines for each stage and for return to play can vary a great deal from athlete to athlete, and this is a summary based on common practice and personal experience. Be sure to follow the instructions of your physician and therapist, and think long-term: let your body tell you when you’re ready for each stage, and don’t push yourself too quickly, risking a re-injury and further delays in your return to play.
References:
Chen, L., Kim, P. D., Ahmad, C. S., & and Levine, W. N. (2008 June). “Medial collateral ligament injuries of the knee: current treatment concepts.” Musculoskelet Medicine , 108–113.
Jones, T. (., & McCulloch, P. (. (2014, December 12). MCL Knee Injuries. Retrieved November 25, 2015, from orthobullets.com: http://www.orthobullets.com/sports/3010/mcl-knee-injuries
Paluska, S. A., & Mckeag, D. B. (2000 January). “Knee Braces: Current Evidence and Clinical Recommendations for Their Use.” American Family Physician , 411-418.
Salata, M. J., Gibbs, A. E., & Sekiya, J. K. (2010 September). “The Effectiveness of Prophylactic Knee Bracing in American Football.” Sports Health , 375-379.
[cf]skyword_tracking_tag[/cf]


